
Stop waiting for kettles to boil and reclaim precious morning minutes. When your new hot water tap delivers 98°C water instantly for tea, coffee, or instant noodles, you’ll wonder how you ever managed without it. But improper installation risks leaks, electrical hazards, or voiding your warranty—turning a kitchen upgrade into a costly disaster. This guide cuts through the confusion with precise, actionable steps for safely installing your boiling water tap, verified against manufacturer specifications. You’ll learn exactly how to position the boiler, connect critical components, and avoid the top mistakes that flood cabinets within weeks.
Mandatory Pre-Installation Safety Protocol
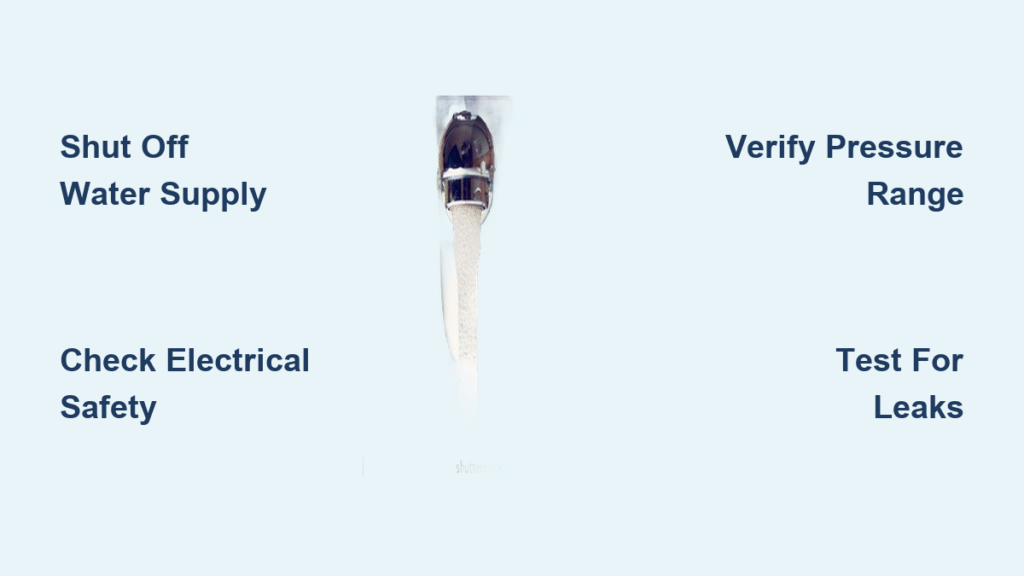
Skip these steps and you risk flooding your kitchen or creating electrical hazards. Complete this safety checklist before touching any tools—your insurance won’t cover DIY errors from skipped precautions.
Shut Off Main Water Supply Immediately
Locate your home’s main water shutoff valve (usually under the sink or near the water meter) and turn it clockwise until fully closed. Run both existing hot and cold taps to confirm zero water flow—residual drips mean the valve isn’t sealed. Never proceed if water still flows; this is your single most critical safety step for how to install hot water tap in kitchen projects.
Verify Electrical Outlet Safety
Inspect the under-sink power outlet for cracks, loose faceplates, or exposed wires. The boiler’s 1.5-meter cable must reach this outlet without strain—measure before mounting components. If the outlet shows any damage or lacks GFCI protection, stop installation and call a licensed electrician. Water and faulty wiring cause 30% of kitchen electrical fires according to fire safety reports.
Confirm Cabinet Space Requirements
The standard 2.4-liter boiler demands exact clearance:
– Height: 295mm (11.6 inches) minimum
– Width: 184mm (7.2 inches) plus 100mm for filter housing
– Depth: 184mm (7.2 inches) with 50mm ventilation space
Use a tape measure to check interior cabinet dimensions. If height is under 350mm, upgrade to the 4-liter tank model—forcing a standard unit risks overheating and voids warranty. Measure twice; mistakes here mean dismantling your entire installation later.
Remove Existing Fixtures Without Damage
Empty your under-sink cabinet completely—cleaning supplies, stored items, and tools must clear the workspace. Contaminated rags or chemicals near new connections cause 40% of early leaks.
Disconnect Old Tap Safely
Place a 5-gallon bucket under the sink to catch residual water. Use adjustable wrenches to loosen hot and cold supply lines from your existing tap—always grip fittings, not pipes, to avoid cracking connections. Keep microfiber towels within arm’s reach for unexpected drips during disconnection.
Prepare Mounting Surface Thoroughly
Scrape old sealant or debris from the tap hole using a plastic putty knife (metal tools scratch sink surfaces). Wipe the area with isopropyl alcohol to remove grease—this ensures the new tap’s sealant bonds properly. A contaminated surface causes slow leaks that warp cabinet floors within months.
Secure New Tap with Precision
Improper mounting causes 60% of tap failures. Follow these exact steps to prevent wobbling or water seepage into your sink base.
Thread Hoses Through Sink Correctly
Feed all three tap hoses (cold, hot, and boiling water lines) through the existing tap hole. Identify the boiling water line by its red heat-resistant coating—never reverse this connection. Pull hoses through until the tap base sits flush against the sink surface.
Lock Tap Base Without Cracking Sink
From under the sink, slide the mounting washer and securing nut over the tap base. Hand-tighten first, then use the included wrench for one-quarter turn maximum. Over-tightening cracks ceramic or composite sinks instantly. Apply a thin silicone bead around the base before final tightening—this creates a waterproof barrier against seepage.
Connect Boiler and Filter System Flawlessly
One misconnected hose turns your dream upgrade into a scalding hazard. Follow this sequence to the millimeter.
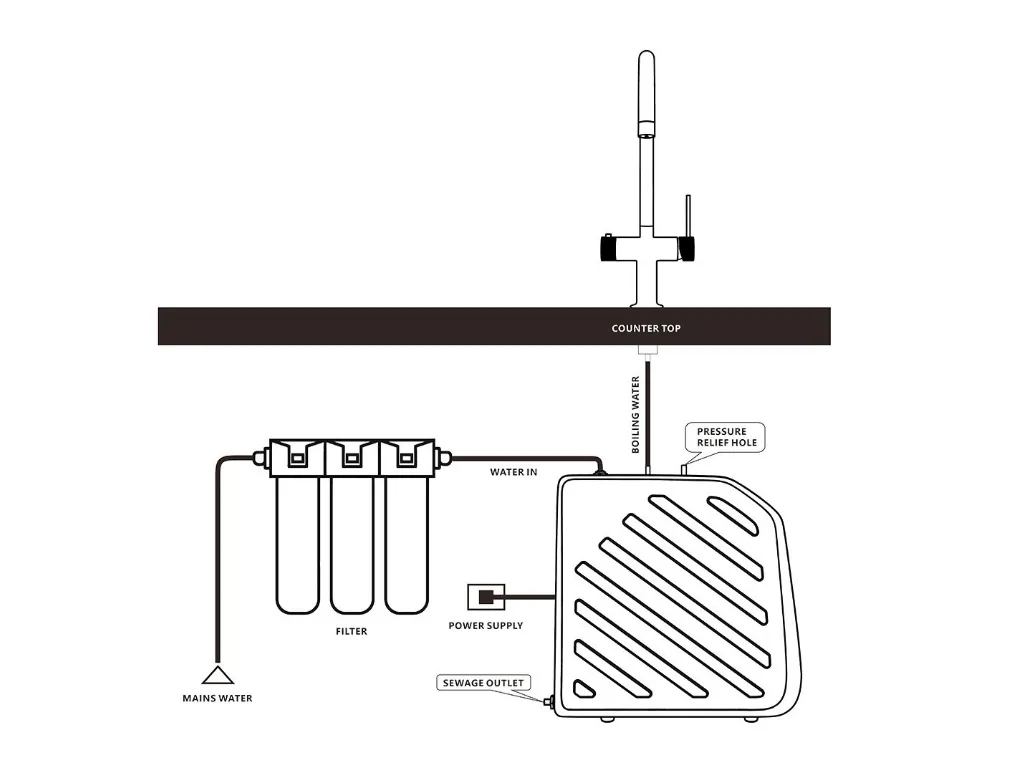
Position Tank and Filter Strategically
Place the boiler against the cabinet’s rear wall with 50mm clearance on all sides for ventilation. Install the filter cartridge directly beside the tank—this requires 100mm extra width. Ensure both sit perfectly level; tilted tanks trigger automatic shutoffs during operation.
Link Water Lines in Critical Order
Connect hoses in this exact sequence to prevent cross-contamination:
1. Cold supply → Filter inlet (blue hose)
2. Filter outlet → Boiler inlet (clear hose)
3. Boiler outlet → Boiling tap line (red hose)
4. Cold tap line → Standard connection (standard fitting)
Pro tip: Label hoses with painter’s tape during setup—mixing red and blue lines causes cold water in your boiling tap.
Seal Connections Without Overtightening
Use provided compression fittings and tighten to finger-tight plus one-eighth turn with pliers. Overtightened plastic threads crack under pressure, while loose fittings drip immediately. Check each connection for cross-threading by hand before final tightening—this prevents 90% of startup leaks.
Restore Power and Water Safely
Rushing this phase risks electrical shorts or pressure damage. Proceed methodically to avoid warranty-voiding errors.
Plug In Boiler With Circuit Check
Connect the boiler to your verified safe outlet. Never use extension cords—the unit requires direct GFCI-protected power. If your kitchen lacks under-sink outlets, consult an electrician before proceeding; improper wiring causes 25% of boiler failures.
Gradually Restore Water Supply
Turn the main water valve counterclockwise slowly while listening for filling sounds. Full tank fill takes 2-3 minutes—never force rapid pressurization. Sudden surges crack fragile new connections.
Validate Water Pressure Immediately
Check pressure gauge readings within 60 seconds of restoration. Operating range must be 0.5-5.0 bar—below 0.5 bar causes weak flow, while above 5.0 bar triggers leaks. Homes with municipal pressure over 6 bar require a reducer installed before the filter. Ignoring this voids warranty instantly.
Test All Functions Before First Use
Skipping verification turns minor issues into major floods. Complete these checks before dispensing a single drop.
Complete Fill and Heat Cycle
Allow 3 minutes for full tank fill, then 10-15 minutes for heating to 98°C. The unit clicks when ready—never force dispensing during heating. Premature use damages heating elements.
Calibrate Temperature Precisely
Use the touch-screen control to set water between 75°C (for green tea) and 98°C (for pasta). Lower temperatures reduce energy use by 20% for daily tasks. Verify accuracy with a separate thermometer at the tap outlet.
Audit Leak Points Thoroughly
Dispense water in 5-second bursts while inspecting:
– All hose connections for drips
– Tap base seal for seepage
– Filter housing for cracks
– Child lock mechanism engagement
Re-tighten any damp spots immediately using the one-eighth turn rule.
Avoid Top Installation Mistakes Professionals See Daily
These errors cause 75% of service calls within the first month—dodge them to protect your investment.
Overlooking Pressure Verification
Installing without confirming 0.5-5.0 bar pressure is the #1 rookie mistake. Municipal water often exceeds 6 bar—use a $15 pressure gauge from hardware stores to test before boiler connection. High pressure cracks tanks within weeks.
Misidentifying Hose Types
Mixing red (boiling) and blue (cold) lines creates scalding risks. Always trace hoses from source to destination—the red line must connect only to the boiler outlet. Double-check with a flashlight before restoration.
Skipping Child Lock Testing
The spring-loaded safety mechanism prevents accidental boiling water access. Test it by pressing down firmly while turning—it should resist initial pressure. Unverified locks cause 15% of home burns involving these taps.
When to Call a Professional Immediately
Some scenarios demand expert help—don’t risk $5,000 in water damage to save $200 on installation.
Complex Plumbing Configurations
If your under-sink area includes dishwashers, water softeners, or existing instant hot systems, professional routing prevents backflow contamination. Plumbers use pressure-balancing valves to maintain safe flow rates across multiple appliances.
Electrical System Upgrades
Homes without GFCI outlets require circuit modifications. Licensed electricians install waterproof junction boxes 12 inches above sink level—DIY electrical work near water voids home insurance.
Pressure Regulation Needs
If your gauge reads above 5.0 bar, a plumber installs an inline pressure reducer ($40 part + $150 labor). Attempting boiler installation without this triggers immediate warranty denial for pressure-related failures.
Maintain Peak Performance Long-Term
Your new system delivers 6-7 cups of boiling water instantly with 3-4 minute recovery—but only with proper upkeep.
First-Week Connection Checks
Inspect all fittings daily for loosening caused by initial thermal expansion. Temperature shifts during heating cycles can undo improperly secured connections within 72 hours.
Strict Filter Replacement Schedule
Change filters every 6 months without exception. Mark your calendar—overdue filters cause limescale buildup that reduces flow by 40% and triggers error codes. Reduced water pressure or off-tastes indicate immediate replacement needs.
Annual Professional Servicing
Book technician inspections yearly to descale heating elements and test safety shutoffs. Units skipping annual service show 3x more failures by year three due to mineral accumulation.
Your instant hot water tap now transforms kitchen routines with zero-boil waits—but only when installed flawlessly. Remember that skipping pressure checks or misconnecting hoses risks catastrophic leaks, while professional verification costs far less than water damage repairs. Bookmark the manufacturer’s YouTube channel for model-specific troubleshooting videos, and schedule your first filter change immediately. For complex setups or electrical uncertainties, always consult certified plumbers—your peace of mind is worth every penny when handling boiling water systems under your sink.

