
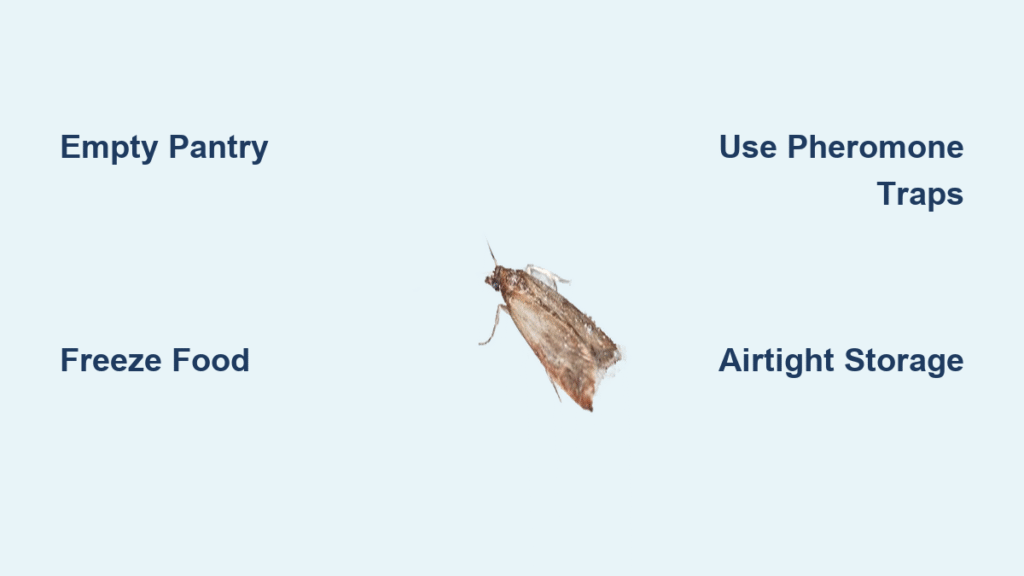
Opening your cereal box only to find tiny gray-brown moths fluttering out—or worse, discovering silken webs in your flour—triggers instant disgust. These aren’t random intruders; they’re pantry moths laying up to 500 eggs each in your food supply. If you’re searching for how to get rid of moths in the kitchen right now, you’ve likely spotted erratic zig-zagging flights near your pantry or sticky clumps in your grains. The good news? You can eliminate these pests completely in 3 days using non-toxic methods that target every life stage—from eggs to adult moths. This guide delivers step-by-step protocols verified by entomologists, focusing exclusively on kitchen-safe techniques that preserve your food and health.
Pantry moths hitchhike into 70% of homes through contaminated groceries like flour, nuts, or pet food. Unlike clothes moths that destroy fabrics, these invaders target your edible supplies exclusively, turning your kitchen into a breeding ground within days. But chemical sprays? Absolutely not—they’re unsafe near food and often fail against hidden eggs. Instead, you’ll deploy a strategic three-phase approach: identification, elimination, and prevention. By the end of this guide, you’ll know exactly how to get rid of moths in the kitchen using freezer protocols, pheromone traps, and airtight storage that stops reinfestations for good.
Confirm It’s Pantry Moths: Indian Meal Moth vs Clothes Moth
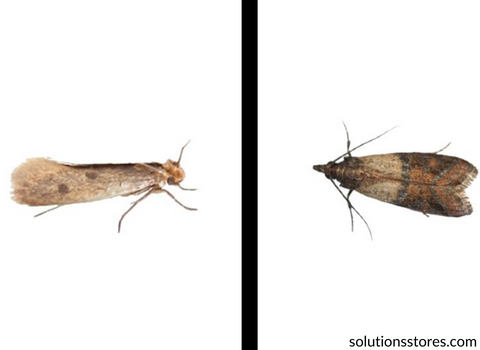
Don’t waste time treating the wrong pest. Pantry moths exclusively infest food storage zones and fly erratically during daylight hours, while clothes moths avoid light and target fabrics. The Indian meal moth (Plodia interpunctella)—your kitchen’s primary invader—measures ¼–⅜ inch with distinctive bronze-tipped wings. When at rest, it folds its wings roof-like over its body, revealing mottled gray-tan patterns.
Key Visual Identification Markers
Look for these telltale signs:
– Size and color: 6–10 mm long with flecked wings (gray/tan/brown)
– Flight behavior: Zig-zagging patterns near ceilings or shelves (not random fluttering)
– Larvae evidence: ⅛-inch white “worms” spinning silken threads through grains or spices
If you spot larger (½-inch), pale gray moths near wool sweaters or carpets, that’s a clothes moth infestation—requiring entirely different solutions.
5 Early Warning Signs of Kitchen Moth Infestation

Catching moths early prevents exponential breeding. Adult females lay eggs directly on food surfaces, so subtle clues matter more than visible moths. Check these often-overlooked indicators before the infestation spreads to every shelf.
Packaging Damage You Can’t Ignore
Pantry moth larvae chew through packaging that seems impenetrable. Inspect for:
– Pin-sized holes in plastic bags or thin cardboard
– Webbing along box seams, jar rims, or container corners
– Clumped grains held together by sticky larval secretions
Discard any item showing these signs immediately—larvae survive in microscopic crevices.
Smell and Texture Red Flags
Your nose detects infestations before eyes do:
– Stale, musty odors in sealed containers (especially flour or cereal)
– Unusually sticky textures in dried fruit or pet food
– Chocolate wrappers with tiny entrance holes and web residue
These changes signal active feeding—meaning eggs are already hatching in your pantry.
Immediate 3-Step Elimination: Stop Moths in Your Kitchen Now
Delaying action guarantees a larger infestation. This protocol isolates and destroys all life stages within 48 hours. You’ll need rubber gloves, trash bags, and freezer space—but no chemicals.
Empty and Inspect Every Item (Day 1)
Remove every object from your pantry—cans, baskets, shelf liners, even spices. Hold packages against light to spot pinholes. Pay special attention to:
– Flour, cereal, nuts, and dried fruit (prime targets)
– Pet food and birdseed (often overlooked entry points)
– Spice jars and candy wrappers (larvae chew through foil linings)
Critical mistake to avoid: Assuming sealed packages are safe. Larvae penetrate plastic bags and cardboard easily—discard anything suspicious in outdoor-sealed trash.
Salvage vs. Discard Rules That Work
Not all food must be thrown out. Follow this science-backed triage:
– Toss immediately: Any item with webbing, larvae, holes, or stale odors
– Freeze for 7 days: Unopened but suspect items at 0°F (-18°C) to kill eggs/larvae
– Transfer to airtight containers: Salvaged foods go into thick-walled glass or heavy plastic with screw-top lids
Never reuse original packaging—even if it looks intact. Larvae leave microscopic eggs on surfaces.
Deep Clean Protocol: Moth-Proof Your Pantry in 20 Minutes
Vacuuming and washing alone won’t eliminate hidden eggs. This method targets larval hotspots professionals inspect, like shelf edges and hinge crevices where moths lay eggs.
Vacuum Every Moth Harbor Point
Use your crevice tool to extract eggs from:
– Shelf corners and undersides
– Drawer tracks and can rims
– Door hinges and knob backs
Pro tip: Moth eggs survive in vacuum bags—empty contents directly into outdoor trash immediately after cleaning.
Wash with Vinegar Solution (Not Just Soap)
Combine equal parts white vinegar and water in a spray bottle. This dissolves larval silk and neutralizes odors better than soap alone. Focus on:
– Cracks between shelves and walls
– Baseboards and floor corners
– Underneath shelf liners (remove them first)
Dry surfaces completely—moisture attracts new infestations. Never skip this step; residual humidity revives dormant eggs.
Set Up Moth Traps That Actually Work (Pheromone & Natural Options)
Traps alone won’t eliminate infestations but are critical for breaking breeding cycles. Place them strategically after cleaning to catch stragglers and monitor success.
Pheromone Trap Placement Secrets
Non-toxic sticky traps baited with female moth pheromones lure males, preventing reproduction. For maximum effectiveness:
– Position near ceiling corners (moths fly upward)
– Install one trap per 100 sq ft of pantry space
– Replace every 60–90 days or when covered in moths
Check traps weekly—if you see adults after Day 7, repeat deep cleaning.
Natural Deterrents That Repel Without Chemicals
Create a hostile environment for moths using kitchen-safe repellents:
– Bay leaves: Tuck 1–2 dried leaves into each container; replace every 2–3 months
– Herb sachets: Mix equal parts dried lavender, rosemary, thyme, and mint in cloth bags
– Cedar blocks: Sand lightly every 3 months to refresh scent (more effective for clothes moths)
Place sachets on shelves—not in food—to avoid contamination.
Prevent Future Kitchen Moth Infestations: 3 Storage Rules
90% of reinfestations stem from improper storage. These rules target how moths enter your kitchen and reproduce, based on USDA food safety guidelines.
Smart Grocery Habits That Block Entry
Inspect packaging integrity before purchasing:
– Avoid dented cans or torn packaging at the store
– Choose factory-sealed products over bulk-bin items
– Freeze new grains for 1 week before pantry storage
This kills hitchhiking eggs in flour, cereal, or nuts before they hatch.
Airtight Container Requirements (Not Optional)
Original packaging offers zero protection. Transfer all dry goods to:
– Glass jars with screw-top lids (Mason jars work perfectly)
– Thick plastic containers with snap-lock seals (avoid thin Tupperware)
Label containers with purchase dates and use older stock first (FIFO method).
Weekly Maintenance Checklist
Prevention requires consistency:
– Vacuum pantry floors weekly to remove crumbs
– Wipe shelves after spills immediately
– Check window/door seals to block outdoor moths
– Refresh bay leaves or herb sachets every 2 months
When to Call a Professional for Kitchen Moth Removal
DIY methods work for 95% of home infestations—but know these red flags signaling professional help is needed:
– Moths persist after two full clean-outs following this guide
– Infestation spreads to multiple rooms beyond the kitchen
– You operate a commercial kitchen (regulatory compliance required)
Never use mothballs near food—they release toxic fumes prohibited in kitchens. Contact your Cooperative Extension Service for verified pest control referrals.
Your Guaranteed 3-Day Moth Eradication Plan: Day 1—Complete pantry emptying and disposal. Day 2—Deep clean with vinegar and freeze salvageable foods. Day 3—Set pheromone traps and transfer all food to airtight containers. Check traps weekly; if moths reappear, repeat Day 2 cleaning. By strictly following these steps, your kitchen will be moth-free within a week—without risking your family’s health with chemicals. The key isn’t just killing current moths but disrupting their breeding cycle through strategic freezing and trapping. Start tonight, and by this time next week, you’ll open your pantry without dreading what’s inside.

