
Your laminate kitchen cabinets should gleam like new—not streaked with cooking grease, clouded by water spots, or smudged with fingerprints. Unlike porous wood surfaces, these plastic-finished cabinets resist stains but demand precise care to avoid permanent scratches, warping, or adhesive failure. One wrong move with abrasive cleaners or excess moisture can strip protective coatings and void warranties. The good news? With the exact techniques professional cleaners use, you’ll restore factory-fresh shine in under 30 minutes using supplies already in your home.
This guide reveals the science-backed process for every laminate type, from daily maintenance to stubborn grease removal. You’ll learn why 90% of homeowners accidentally damage cabinets with common “safe” products—and how to avoid those costly mistakes. Most importantly, you’ll discover the universal cleaning formula that works on all plastic-based laminates without risking your warranty.
Identify Your Laminate Type Before Cleaning
HPL vs RTF vs Acrylic: Critical Differences That Dictate Cleaning Methods
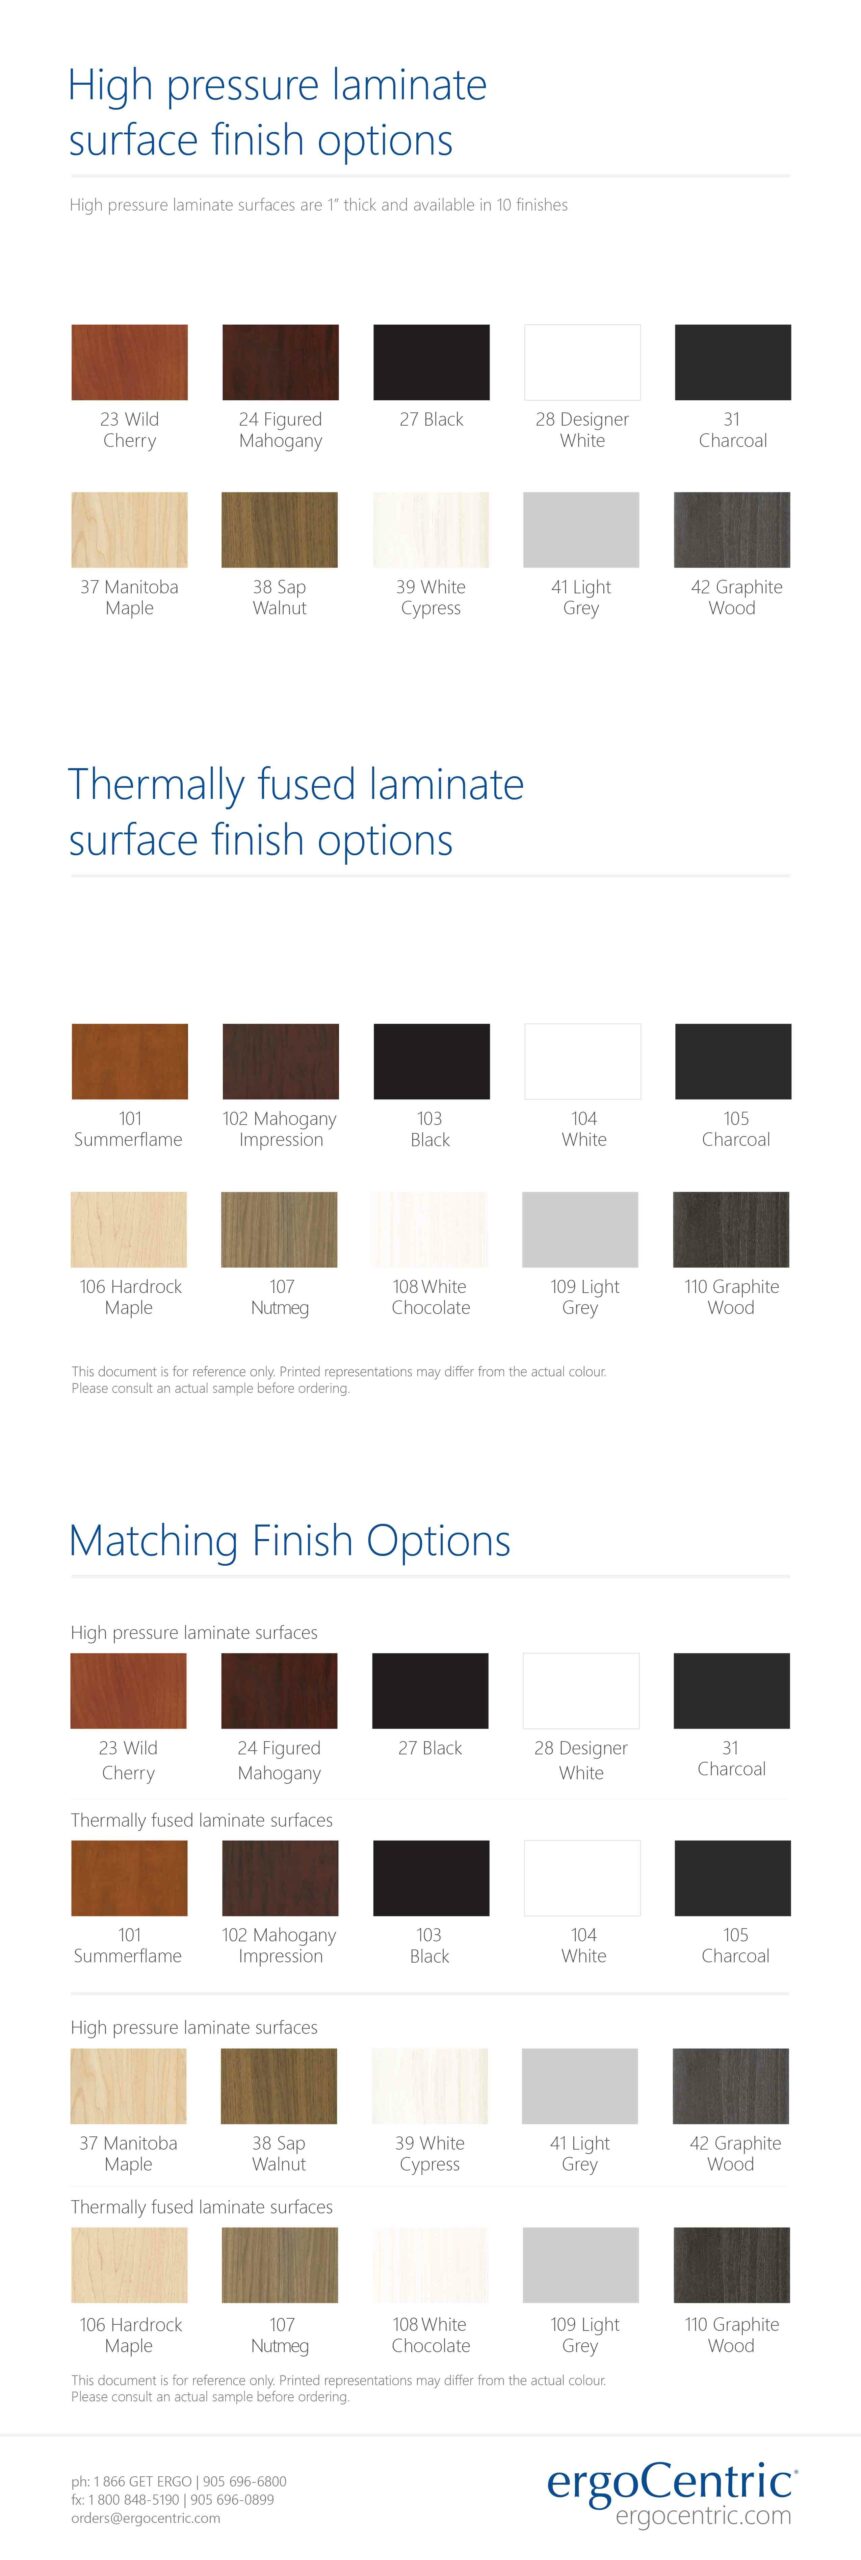
High-Pressure Laminate (HPL) cabinets withstand rigorous scrubbing thanks to their triple-layer melamine-resin construction. Run your fingernail along an inconspicuous edge—you’ll feel rigid, layered resistance. Rigid Thermafoil (RTF) wraps vinyl around contoured MDF cores, creating seamless curves but making it vulnerable to heat damage near ovens. Acrylic-finish laminate delivers mirror-like shine but shows every fingerprint and scratch.
Spot-test your finish: Dampen a hidden corner with distilled water. HPL beads water instantly; RTF absorbs slightly within 10 seconds; acrylic remains perfectly slick. Never assume—using RTF-safe methods on acrylic causes permanent hazing.
Wood Veneer Red Flags That Change Everything
If your cabinets show visible wood grain texture or warm, organic color variations, you’re dealing with wood veneer—not plastic laminate. Using plastic-specific cleaners on veneer dissolves protective oils and causes irreversible swelling. Confirm by checking cabinet interiors: solid wood or laminate substrates indicate true laminate surfaces, while raw wood edges mean veneer.
Daily Cleaning Routine That Prevents Permanent Damage
15-Second Spill Response Technique
Keep a folded microfiber cloth in your sink cabinet. When sauce splatters or coffee drips hit cabinet fronts, immediately blot vertically downward using light pressure. Never wipe in circles—that grinds particles into the surface. Work from the spill’s outer edge inward to contain spread. This 15-second habit prevents baked-on grease that requires aggressive scrubbing later.
Weekly Dust Prevention Protocol
Dust your cabinets top-to-bottom every Sunday morning using a dry microfiber cloth. Focus on upper cabinet lips where airborne grease accumulates. This 5-minute ritual removes abrasive particles that scratch surfaces during deeper cleaning. Skip this step, and daily wiping turns microscopic grit into sandpaper against your finish.
Safe Cleaning Solutions That Actually Work
:strip_icc()/bhg-dawn-dish-soap-hacks-7369705-1f2209b907824df2b5827d839fd19012.jpg)
The Universal Dish Soap Formula (8 Drops Per Liter)
Mix 8 drops of pH-neutral dish soap (like Dawn Ultra) into 1 liter of warm distilled water in a dedicated spray bottle. Distilled water prevents mineral deposits; warm water cuts grease 3× faster than cold while evaporating quickly to protect moisture-sensitive seams.
Critical test: Spray solution on an inside cabinet door edge. Wait 5 minutes. If no white haze appears when dry, it’s safe for your finish. If haze forms, reduce soap concentration by half.
When Specialty Solutions Are Worth the Risk
- Black tea solution: Brew 3 bags in 1L water, cool completely. Spray onto cloth (never directly), wipe, then dry within 60 seconds. Tannins dissolve grease while adding subtle shine—ideal for monthly deep cleans on HPL surfaces.
- Baking-soda paste: Only for isolated grease spots. Mix ¼ cup baking soda with 1 Tbsp water and 1 tsp vinegar to form paste. Apply with soft toothbrush using zero pressure, dwell 5 minutes max, then rinse thoroughly. Never use on entire surfaces—it’s abrasive enough to cloud acrylic.
Step-by-Step Deep Cleaning Process
Empty and Organize Without Kitchen Chaos
Work one cabinet section at a time. Place contents on countertops in reverse order of removal (last item out goes on bottom). This prevents restocking confusion and protects countertops from accidental spills.
Interior Cleaning Sequence (Top-to-Bottom)
- Vacuum crumbs with brush attachment—never skip this. Loose debris turns cleaning cloths into scratch tools.
- Spray only your cloth (never the cabinet) with soap solution until damp.
- Wipe shelves back-to-front, catching drips at front edges with a second cloth.
- Clean grooves with a soft toothbrush using feather-light pressure—no scrubbing.
- Rinse with water-dampened cloth, then dry immediately with a third microfiber cloth.
Exterior Surface Technique That Prevents Water Damage
Start at the top left corner of each door. Wipe in straight horizontal lines overlapping by ½ inch. Clean handles separately—they harbor 400× more bacteria than countertops. Finish by buffing with a dry microfiber cloth using circular motions to restore shine without streaking.
Remove Stubborn Grease Without Ruining Your Finish

Progressive Treatment Method (3-Step Escalation)
- First: Reapply dish soap solution, increasing dwell time to 2 minutes.
- Second: Use baking-soda paste only on affected spot with soft toothbrush (30-second gentle circles max).
- Last resort: Spray cloth with 1:10 vinegar-to-water solution. Wipe, then rinse/dry within 30 seconds. Never use undiluted vinegar—it dissolves laminate adhesives within 72 hours.
Stain-Specific Solutions That Actually Work
- Dried food: Rehydrate with warm damp cloth for 2 minutes before cleaning.
- Coffee rings: Black tea solution outperforms soap—apply, wait 60 seconds, wipe vertically.
- Grease film: Double soap concentration temporarily, but never increase dwell time beyond 3 minutes.
Tools That Protect Your Investment
Essential 4-Item Kit
- 3 color-coded microfiber cloths: Blue for cleaning, white for rinsing, gray for drying.
- Dedicated soft toothbrush: Label “cabinets only” to avoid cross-contamination.
- Spray bottle: Only for soap solution—never repurpose for vinegar.
- Lint-free cotton cloths: For final buffing on high-gloss acrylic surfaces.
Never-Use Items That Destroy Laminate
- Paper towels (scratch acrylic surfaces at microscopic level)
- Magic erasers (remove protective coatings within 3 uses)
- Steam cleaners (cause delamination in 48 hours)
- Ammonia-based cleaners (create permanent white film in 24 hours)
Moisture Control: The Hidden Damage Factor
Water Management Rules That Preserve Warranty
After cleaning, run your finger along door bottoms—if water beads, dry again immediately. Warm water evaporates 40% faster than cold, reducing moisture exposure time. Never let water pool at seams for more than 10 seconds—that’s how delamination starts.
Heat Protection Strategy for Oven-Area Cabinets
Install ¼-inch ceramic heat shields if your toaster or coffee maker sits beneath cabinets. During oven self-cleaning cycles, open cabinet doors to prevent heat buildup that warps RTF edges within 30 minutes.
Maintain Factory Finish With Minimal Effort
Monthly Maintenance Checklist
- Spot-clean visible marks with diluted soap solution
- Deep-clean handles/knobs using toothbrush and vinegar rinse
- Check for loose edges that could trap moisture
- Buff high-gloss surfaces with dry microfiber to prevent dulling
Annual Deep Clean Calendar
Schedule interior cleaning during spring cleaning and before holiday cooking. Empty completely, vacuum debris, wash all surfaces using the top-to-bottom protocol, and inspect for damage needing professional attention.
When Cleaning Isn’t Enough: Damage Recognition
Permanent Damage Warning Signs
If you see bubbling edges, heat-induced discoloration, or scratches that catch your fingernail, stop cleaning immediately. These indicate laminate separation or coating failure that worsens with continued cleaning.
Professional Repair Options
Cabinet refacing replaces doors while keeping boxes—typically a 2-4 day process costing 30-50% less than full replacement. For wood-veneer laminate, professional tune-ups restore color and add protective coating in one day.
Your laminate cabinets will maintain showroom appearance for 15+ years when you follow this systematic approach. That daily 15-second spill response prevents the deep cleaning marathons that risk warranty voidance—and keeps your kitchen looking professionally maintained. Stick to the 8-drops-per-liter formula, avoid the prohibited tools, and you’ll never face costly refinishing bills.

