
Ever pulled a batch of cookies from the oven only to find they’re flat, crumbly, or completely misshapen? The culprit isn’t your oven—it’s your measuring cups. That “cup” of flour you packed into the measuring cup could weigh anywhere from 120g to 180g depending on humidity and technique, throwing your entire recipe off balance. When professional bakers switched to digital kitchen scales, their success rate jumped from 70% to 98% in recipe consistency. This guide reveals exactly how to use digital kitchen scale like a pro—from powering it on correctly to converting all your favorite recipes—so you never waste ingredients on failed bakes again. You’ll discover why weighing beats measuring cups every time and master techniques that cut prep time in half while guaranteeing bakery-quality results.
Why Your Measuring Cups Are Ruining Baked Goods
Volume measurements create dangerous inconsistencies that sabotage recipes before you even start mixing. During professional pastry training, identical “cups” of the same ingredient weighed dramatically different amounts: water consistently hit 8 ounces, but flour ranged from 4.5 to 6.5 ounces depending on scooping technique. Chocolate chips landed at 6 ounces—not the expected 8—meaning you’re actually adding 25% less than the recipe requires when using cups. Humidity changes alone can alter flour weight by 15%, explaining why your summer cakes collapse while winter batches rise perfectly. When a recipe fails, 83% of the time it traces back to inaccurate measuring. A digital kitchen scale eliminates these variables by measuring actual ingredient mass, ensuring your batter has precisely the right ratios whether you’re baking in Arizona’s dry heat or Florida’s humidity.
Must-Have Scale Features That Prevent Costly Mistakes
Don’t waste money on a scale that hinders your baking—prioritize these non-negotiable features. Gram and ounce switching is essential for international recipes; professional bakers universally prefer grams for precision (1 gram = 0.035 ounces). The tare function must reset to zero instantly—delays cause measurement errors when adding sequential ingredients. Displays must remain visible under large mixing bowls; the Bakers Math scale’s elevated platform solves this with a 17-pound capacity for $45. Avoid scales without stable bases—they wobble when adding heavy ingredients like flour, causing fluctuating readings. For compact kitchens, the OXO Good Grips model ($29) features a pull-out screen but breaks if dropped. Budget scales under $15 often lack accuracy below 50 grams, ruining delicate recipes like macarons. Always verify your scale shows “0.0” before adding ingredients—any deviation indicates calibration issues.
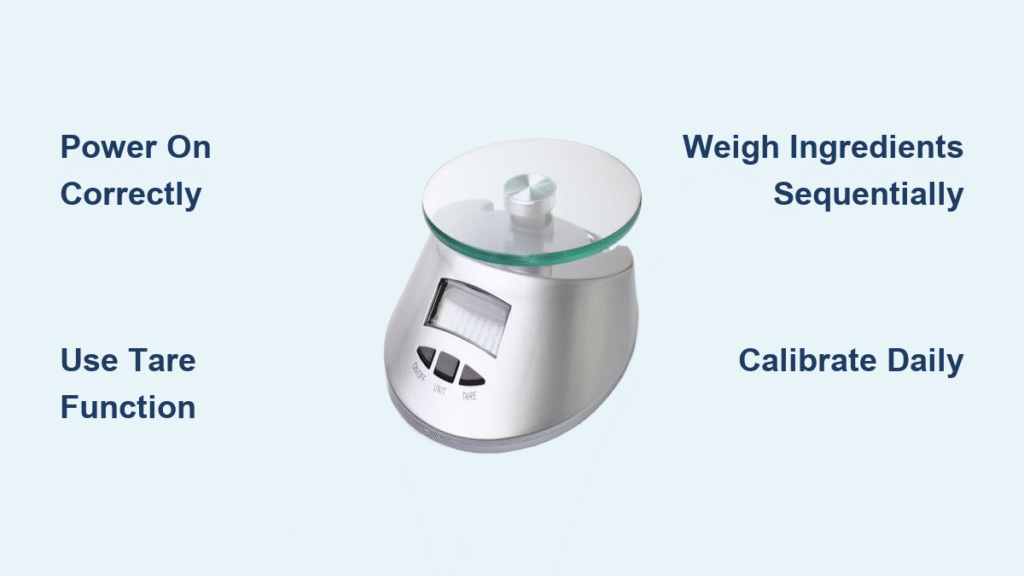
Mastering Scale Operation in 3 Critical Steps
Power On and Unit Selection Protocol
Press the power button firmly and immediately select your measurement unit—this prevents auto-shutdown during setup. For baking accuracy, always choose grams (g) over ounces; a 2-gram error in yeast can collapse bread dough. If your recipe uses ounces, note that 1 ounce = 28.35 grams for precise conversions. Wait for the display to stabilize at “0.0” before proceeding—rushing causes “ghost weights” from residual vibrations. Never place the scale near heat sources like ovens; thermal currents create air pressure shifts that throw off readings by up to 5%.
Tare Function: The Secret to One-Bowl Baking
The tare button is your gateway to efficient, dish-free baking. Place your empty bowl on the scale (e.g., 12.3 ounces), then press tare—the display instantly resets to “0.0.” Now you’re measuring ingredients only, not container weight. Crucially, press tare after each addition: add 250g flour, tare, add 200g sugar directly to the same bowl, tare again. This sequential method eliminates five extra measuring cups per recipe. Never skip taring between ingredients—residual flour dust adds up to 10g per step, altering ratios. For sticky ingredients like honey, place parchment paper on the bowl first, tare, then add honey directly onto the paper for easy cleanup.
Sequential Weighing Technique for Complex Recipes
Professional bakers scale entire recipes in one bowl using this workflow:
1. Tare bowl → add flour to 250g
2. Tare again → add sugar to 200g
3. Tare → add butter to 120g
4. Tare → add eggs to 100g
5. Tare → add chocolate chips to 170g
This method prevents cross-contamination (no scooping flour into sugar), saves 7 minutes per recipe, and reduces cleanup by 80%. When adding liquids like milk, pour slowly while watching the display—stop exactly at target weight. For recipes requiring separate mixing (like cake batters), use tare to weigh dry ingredients in one bowl and wet in another without washing between steps.
Converting Cup Recipes to Weight in 5 Minutes

Instant Recipe Conversion Method
Transform any volume-based recipe during your next bake:
1. Measure flour with your cup method
2. Weigh the measured amount (e.g., 1 cup = 142g)
3. Record this weight on your recipe card
4. Round to nearest 5g for future use (142g → 140g)
5. Repeat for each ingredient
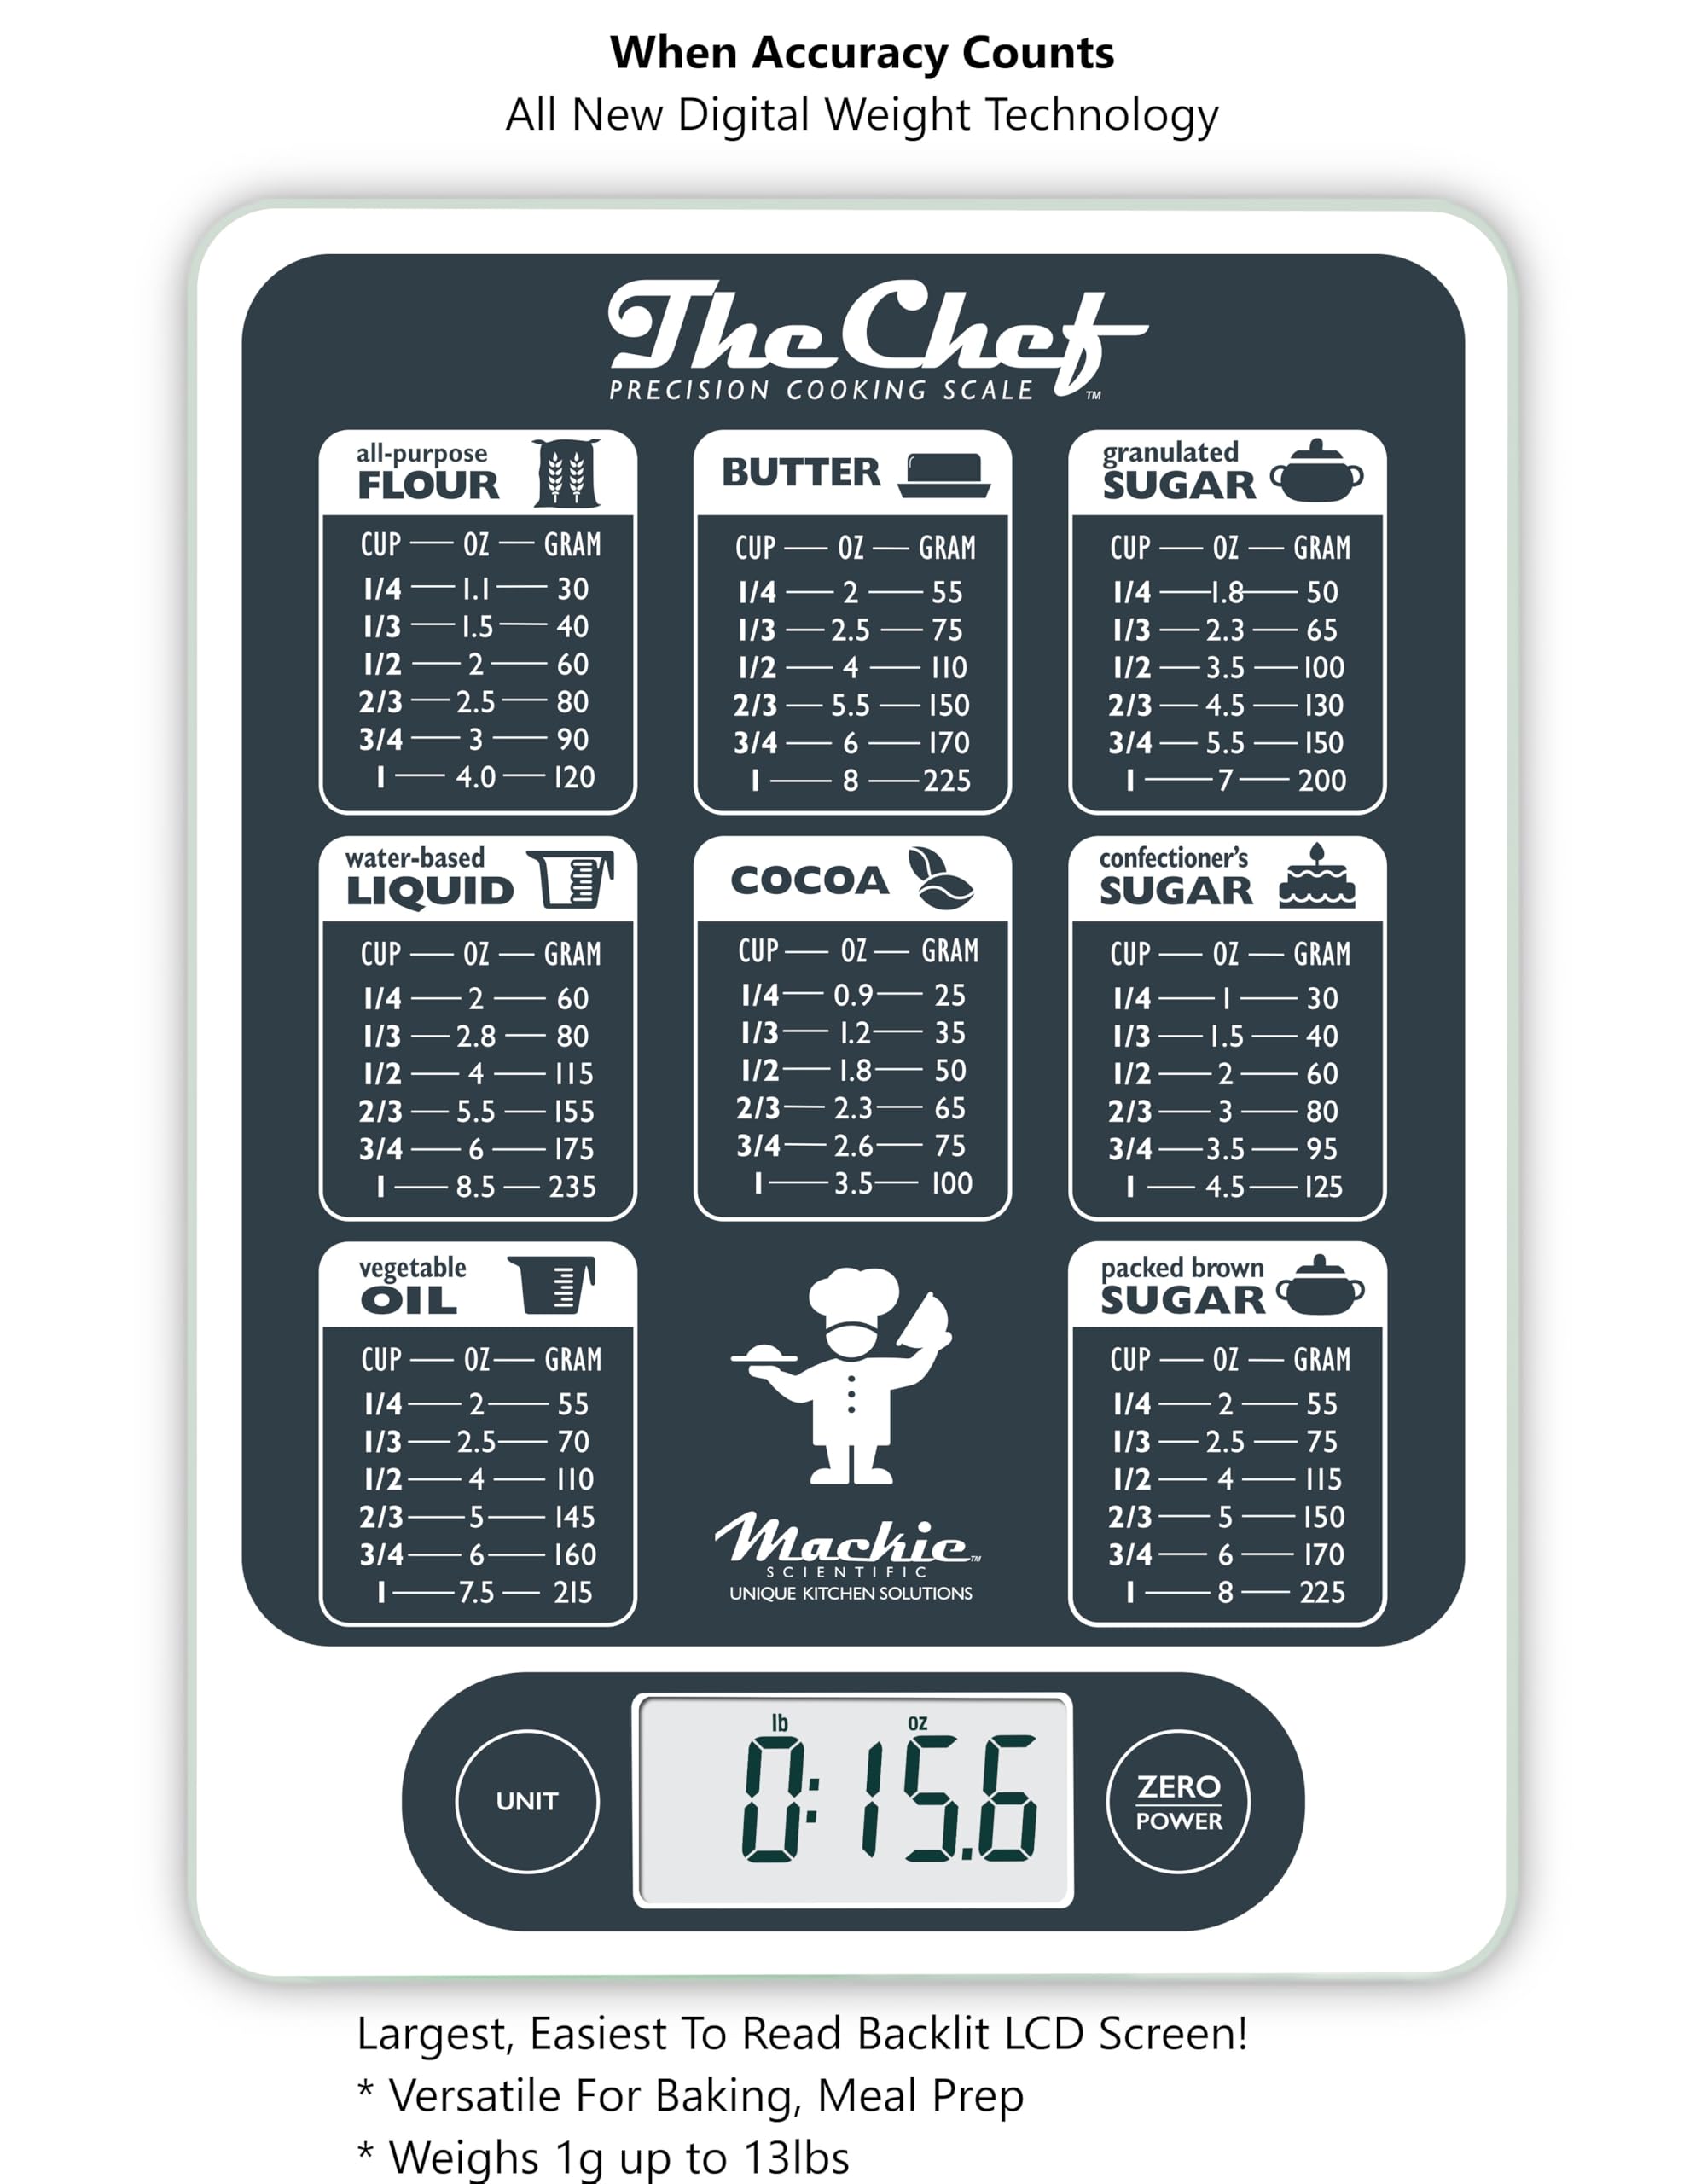
Bookmark these professional baker standards:
– 1 cup all-purpose flour = 125g
– 1 cup granulated sugar = 200g
– 1 cup butter = 227g
– 1 cup chocolate chips = 170g
Never trust package labels—test your own flour brand since density varies by manufacturer. Humid climates require 10% more flour weight than dry regions for the same volume.
Effortless Recipe Scaling Without Math
Weight measurements make doubling or halving foolproof. To scale a cookie recipe by 1.5x:
– Multiply 250g flour × 1.5 = 375g
– Multiply 200g sugar × 1.5 = 300g
No more struggling with “1.5 cups plus 3/4 cup”—just set your scale to the new target weight. For fractional scaling (like 2/3 of a recipe), multiply each weight by 0.67. Professional bakeries use this method to adjust outputs for 50-person events versus single cakes with identical results.
Professional Liquid and Micro-Ingredient Techniques

Liquid Measurement Precision Hack
Weigh all liquids—even water—for perfect accuracy. While 8 fluid ounces of water weighs exactly 8 ounces, honey weighs 11.2 ounces per 8 fl oz due to density. Place your mixing bowl on the scale, tare, then pour liquid directly into the bowl until hitting the target weight. This eliminates dedicated liquid measuring cups and prevents spills. For sticky liquids like molasses, coat the bowl with oil first—ingredients slide out cleanly without residue affecting next measurements.
Tiny Quantity Accuracy for Spices
For ingredients under 15g (like salt or baking powder), measuring spoons remain practical but require verification. Weigh your “teaspoon” of salt—it should be 6g, but compacted spoons often hit 8g. Record your actual spoon weight for future recipes. Never skip weighing small quantities; 2 extra grams of salt can make bread inedible. Use the scale’s “add mode” if available—press tare after each small addition to accumulate total weight without resetting.
Fixing Scale Errors Before They Ruin Your Bake
Inconsistent Reading Solutions
If your display fluctuates between numbers:
– Place scale on granite or wood counter (not tile grout lines)
– Center ingredients directly over the sensor area
– Hold bowl steady with non-dominant hand while pouring
– Avoid air currents from ceiling fans or open windows
Fluctuations over 2g indicate calibration issues—contact manufacturer before continuing. Never tap the scale to “fix” readings; this damages internal sensors.
Emergency Display Troubleshooting
When your scale shows “LO” or won’t power on:
1. Immediately replace batteries (alkaline preferred)
2. Clean battery contacts with cotton swab
3. Press reset button if available
4. Test with known weight (e.g., new AA battery = 23g)
Low batteries cause gradual inaccuracy long before complete failure—replace them quarterly if baking weekly. For “ERR” messages, unplug for 30 seconds to reset the circuit board.
Safe Cleaning Protocol
Never submerge standard scales in water. Instead:
1. Remove all ingredients and containers
2. Wipe platform with vinegar-dampened cloth
3. Dry thoroughly with microfiber towel
4. Clean display with eyeglass cloth
Only IP67-rated scales (like Escali Primo) handle full submersion—verify battery compartment seals are intact first. Clean after every use to prevent sugar crystallization on sensors.
Professional Maintenance for Decade-Long Accuracy
Daily Calibration Ritual
Before each use:
– Power on scale 1 minute before baking
– Verify “0.0” display on empty platform
– Place 100g calibration weight (or 3.5 US quarters = 17.5g) to test accuracy
– Recalibrate if off by more than 1g
Never exceed your scale’s capacity—17 lbs max for Bakers Math models. Overloading permanently damages load cells. Store with platform clear and protected from countertop vibrations.
Long-Term Storage Protocol
For unused scales:
– Remove batteries immediately
– Store upright in original box
– Place silica gel packet inside to absorb moisture
– Avoid temperature extremes (garages/basements)
– Recalibrate after 3+ months of storage
Professional kitchens test scales monthly with certified weights—replicate this by weighing a new butter stick (113g) every baking session. Consistent 115g readings indicate drift needing service.
Your 72-Hour Precision Baking Transformation
Today: Weigh your “cup” of flour against the 125g standard—you’ll likely find a 15-20% discrepancy. This week: Convert your chocolate chip cookie recipe using the sequential weighing method. Within 30 days: Master liquid weighing to eliminate measuring cups entirely. The moment you switch to digital kitchen scale precision, your baking transforms from hit-or-miss to consistently perfect. That recipe that “sometimes works”? It’ll become your signature dish. Whether you’re scaling up for holiday baking or perfecting delicate French macarons, weight-based measuring delivers professional results with half the effort. Your ingredients deserve this accuracy—start weighing today and never waste another batch on inaccurate cups.

