
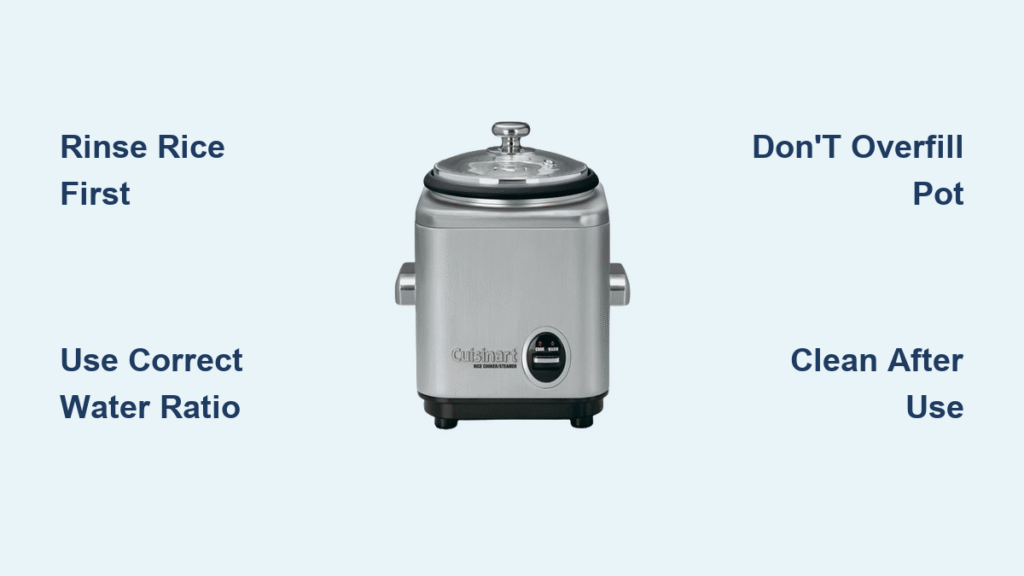
Ever stared at a pot of mushy rice or dealt with burnt grains sticking to the bottom? Your Cuisinart rice cooker eliminates these stovetop frustrations with its smart technology that handles timing and temperature automatically. Learning how to use Cuisinart rice cooker properly transforms your kitchen experience—no more guessing when to check the pot or worrying about perfect water ratios. Within minutes of pressing a button, you’ll have fluffy, restaurant-quality rice ready for any meal.
Unlike traditional cooking methods, Cuisinart’s fuzzy logic technology adjusts cooking time based on rice quantity and type, ensuring consistent results whether you’re making dinner for two or meal prepping for the week. This guide walks you through every step of operating your appliance—from measuring precise water ratios to troubleshooting common issues—so you can master this essential kitchen tool immediately. Let’s transform your grains from hit-or-miss to perfectly cooked every single time.
Measure Rice and Water Ratios Correctly

White Rice Formula for Fluffy Results
Your Cuisinart rice cooker comes with a dedicated measuring cup (6 ounces) that’s smaller than standard cups—use this for both rice and water. For perfect white rice, follow the 1:1 ratio: 1 cup rice to 1 cup water. When cooking multiple cups, maintain this proportion exactly—2 cups rice needs precisely 2 cups water. The cooker’s smart sensors automatically adjust cooking time based on your quantity, taking 35-45 minutes for optimal results.
Brown Rice Water Adjustments
Brown rice requires extra moisture to soften its bran layer. Increase water by 25%—use 1¼ cups water per cup of rice. Your cooker extends the cycle to 50-60 minutes to fully hydrate the grains. For best texture, let brown rice rest 10 minutes after cooking before fluffing. You’ll notice the grains separate easily when done, rather than sticking together in clumps.
Specialty Grain Ratios You Need to Know
- Quinoa: Rinse thoroughly to remove bitter coating, then use 1 cup quinoa to 2 cups water
- Steel-cut oats: Combine 1 cup oats with 3 cups water for creamy porridge
- Wild rice: Requires 1 cup rice to 3 cups water on the Brown Rice setting
- Jasmine/Basmati: Reduce water to ¾ cup per cup of rice for that signature firm texture
Load Your Rice Cooker Properly

Rinse Before Cooking for Better Texture
Always rinse rice in a separate bowl until the water runs clear—this removes excess starch causing foam and stickiness. For aromatic varieties like jasmine, soak for 20 minutes before cooking to enhance texture, but reduce water by 2-3 tablespoons to compensate for absorbed moisture. Look for the water to become nearly transparent after 3-4 rinses, indicating most surface starch is removed.
Proper Loading Technique to Prevent Overflow
After rinsing, transfer rice to the non-stick pot and add measured water. Level the surface with a wooden spoon to ensure even cooking. Never exceed the MAX fill line—rice triples in volume during cooking. Check that the pot sits flush on the heating plate; a slight wobble creates hot spots leading to uneven cooking. If your cooker has a water level indicator inside the pot, align your liquid with the corresponding mark for your rice type.
Select Cooking Programs for Perfect Results
Basic Rice Types and Timing
Press White Rice for standard grains (35-45 minutes). Choose Brown Rice for whole grains (50-60 minutes). Sushi Rice creates the firm texture needed for rolls, while Quick Rice cuts time by 25% but may sacrifice some texture quality. The LED display shows estimated completion time after selection—watch for the countdown during cooking. When done, the display switches to “Keep Warm,” maintaining 140°F for up to 12 hours.
Steam While Rice Cooks for Complete Meals
Fill the pot with 1-2 cups water below the steamer basket level. Load vegetables, fish, or dumplings in the basket. Press Steam while rice cooks below. Timing guide: Vegetables need 10-15 minutes, Fish fillets require 8-12 minutes, Dumplings cook in 12-18 minutes. Position the condensation collector at the back to catch excess moisture. Never open the lid during steaming—release hot steam away from your face when the cycle ends.
Program Delayed Cooking for Convenience
Morning Rice Ready When You Wake
Load ingredients the night before. Press Delay Start, then use +/- buttons to set hours until cooking begins (up to 24 hours). Perfect for waking to fresh steel-cut oats or having rice ready after work. The display shows hours remaining until cooking begins.
Safety Considerations for Delayed Cooking
Avoid using delay start for perishable add-ins like eggs or dairy. The unit keeps ingredients at room temperature until cooking begins. Never use this function with raw meat—cook rice first, then add protein later. Check that the pot sits correctly on the heating plate before setting the delay.
Clean After Every Use to Extend Lifespan
Quick Daily Maintenance Routine
Unplug and let cool completely. Remove the pot and wash with warm, soapy water using only soft sponges—never metal scrubbers that damage the non-stick coating. Wipe the heating plate with a damp cloth to prevent residue buildup affecting future performance. The lid and steam vent are top-rack dishwasher safe. Empty and rinse the condensation collector after each use to prevent mold.
Monthly Deep Clean for Optimal Performance
Fill the pot with equal parts water and white vinegar. Run a complete cycle without rice, then discard and rinse. Soak removable parts in baking soda solution (1 tbsp per cup warm water) for 30 minutes to eliminate odors. Check the steam vent for mineral deposits, especially in hard water areas. Never submerge the base unit in water—clean exterior with a damp cloth only.
Fix Common Texture Issues Immediately
Mushy Rice Solutions
Overcooked rice typically results from too much water. Let it rest 10 minutes with the lid closed to absorb excess moisture—watch for steam reducing as it dries out. Next batch, reduce water by 2-3 tablespoons. Never stir rice during cooking, as this releases starch causing mushiness.
Undercooked Center Fixes
Hard centers indicate insufficient water. Add ¼ cup hot water, stir gently, and restart the cycle for 5-10 minutes. Check after 5 minutes to prevent overcooking—you’ll see steam release when opening the lid if it’s done. Ensure the pot sits flush on the heating plate for even heat distribution.
Decode Error Codes Quickly
E1 – Overheating Alert
The unit detected excessive heat, usually from an empty pot or insufficient water. Add proper water levels and restart. Ensure the pot sits correctly on the heating plate—look for even contact around the entire base.
E2 – Pot Detection Failed
The sensor can’t detect the cooking pot. Remove and reseat the pot, ensuring it’s clean and properly aligned. Clean the heating plate contact points with a damp cloth. Check for rice residue preventing proper seating.
Store Cooked Rice Safely
Immediate Storage Protocol
Transfer leftover rice to shallow containers within 2 hours. Refrigerate at 40°F or below—never leave cooked rice at room temperature longer than this food safety window. Properly stored rice stays fresh 3-5 days.
Reheating Methods for Best Texture
Sprinkle 1-2 tablespoons water over rice before using the Reheat function (10-minute cycle). For stovetop reheating, add water and heat to 165°F internal temperature—use a food thermometer to verify. Leftover rice should steam vigorously when reheated properly.
Maintain Your Cooker for Longevity
Proper Storage Between Uses
Store in a dry location with the lid slightly open to prevent odors. Wrap the cord loosely around the base hooks—never twist tightly. Keep accessories inside the pot—never stack heavy items on the glass lid. Check that all parts are completely dry before storage.
Warranty Registration for Peace of Mind
Register online within 30 days to activate your 3-year warranty. The warranty covers the base and heating element but excludes the non-stick coating and accessories. Keep your receipt as proof of purchase for warranty claims.
Mastering how to use Cuisinart rice cooker transforms your kitchen routine from stressful to seamless. Start with basic white rice to understand the water ratios, then experiment with grains, steaming, and delayed cooking. The fuzzy logic technology handles the timing—you just enjoy perfect results every time. Remember these key takeaways: always rinse rice first, follow precise water ratios, never exceed the MAX fill line, and clean thoroughly after each use. Within a week of proper use, you’ll wonder how you ever cooked rice any other way—your perfectly fluffy grains will become the foundation for countless delicious meals.

