

Your Cosori rice cooker sits ready to transform your kitchen routine, but that blinking display and unfamiliar buttons might have you second-guessing your purchase. You’re not alone—nearly 70% of new rice cooker owners underutilize their appliance’s capabilities, settling for basic rice when they could be creating restaurant-quality meals with minimal effort. This comprehensive guide cuts through the confusion, showing you exactly how to use Cosori rice cooker to achieve perfectly cooked grains, steamed vegetables, and complete one-pot dinners. By the end, you’ll understand every button, setting, and technique needed to unlock your appliance’s full potential.
Unbox, Clean, and Run Your First Test Cycle
Remove Packaging and Clean Components Thoroughly
Start by carefully removing all protective films from the inner pot and control panel. Take out the rice paddle, measuring cup, and steam tray, then wash each piece in warm, soapy water—these accessories are dishwasher-safe but hand-washing preserves their longevity. Pay special attention to the steam vent cap, which often has protective film that needs removal. Dry every component completely before assembly; residual moisture interferes with proper cooking. Never submerge the main unit in water, but wipe the exterior and heating plate with a damp cloth to remove manufacturing residues.
Complete Your Essential Test Run
Before cooking actual rice, eliminate factory residues with a simple water cycle. Pour 2 cups of plain water into the inner pot using the provided measuring cup, secure the lid until it clicks, and select the basic white rice program. This 35-minute cycle cleans the heating element and verifies proper operation. When complete, discard the water and wipe the inner pot dry. This crucial first step prevents metallic tastes in your future meals and confirms your unit functions correctly—don’t skip it, even if you’re eager to cook real rice immediately.
Precise Rice Measurement and Preparation Techniques

Use the Correct Measuring Cup and Method
Your Cosori includes an 180ml measuring cup specifically calibrated for perfect rice-to-water ratios—this isn’t a standard US cup, so never substitute kitchen measuring cups. For accurate results, fill the provided cup without packing or tapping the rice, then level off the top with a straight edge. One cup of uncooked rice yields two generous servings, making meal planning simple. When measuring multiple cups, rinse each portion separately to ensure consistent water absorption. Always measure dry rice before rinsing, as water content changes the volume.
Rinse Rice Properly for Optimal Texture
Place measured rice in a fine-mesh strainer and rinse under cold running water, gently swishing grains with your fingers. Continue rinsing 2-3 times until the water runs mostly clear—this removes excess surface starch that causes gumminess. For brown rice varieties, extend this process by soaking the rinsed grains for 30 minutes before cooking; this breaks down tough bran layers for tender results. Never skip rinsing, even with “no-rinse” labeled rice—your Cosori’s precision programming expects properly prepared grains. Drain thoroughly in the strainer for 1-2 minutes before transferring to the inner pot.
Water Ratio Mastery for Perfect Results

Follow Inner Pot Markings with Precision
Transfer rinsed rice to the cleaned inner pot and add water to the corresponding line marked inside the pot. For white rice, fill to the “2” line for 2 cups of rice, “4” for 4 cups, and so on—these markings account for specific absorption rates. When cooking brown rice, increase water by 20% beyond the marked lines; if the 2-cup line indicates 2.5 cups water, add 3 cups total. Always check water levels with the pot sitting on a level surface, viewing markings at eye level for accuracy. The water should cover rice by about 1/8 inch when properly measured.
Customize Water for Your Texture Preferences
Fine-tune water amounts based on your desired outcome. Add 1-2 tablespoons extra water for exceptionally soft rice ideal for sushi or congee. Reduce water by 1-2 tablespoons for firmer grains perfect for fried rice or grain bowls. Older rice (stored over 6 months) absorbs more water, so increase quantities slightly—start with an extra tablespoon per cup. When experimenting with new rice varieties, keep notes on water adjustments that work best for your taste. Remember that altitude affects cooking, requiring slightly more water at higher elevations.
Control Panel Navigation Made Simple
Essential Button Functions Explained
Your Cosori’s control panel features five critical buttons you’ll use daily. The Power/Keep Warm button activates the unit and automatically maintains cooked rice at safe temperatures. Press Menu repeatedly to cycle through cooking programs—white rice, brown rice, quick rice, steam, and porridge. Start/Cancel begins cooking cycles or stops them immediately if needed. The +/- buttons adjust delay timers and cooking preferences. Master these five buttons, and you’ll control 95% of your cooker’s functions without consulting the manual.
Decode Display Lights and Error Messages
During cooking, the LED display shows a countdown timer with flashing lights indicating active heating. When cooking completes, the display switches to solid illumination showing “Keep Warm” and tracking warming duration. Learn to recognize critical error codes: E1 signals a temperature sensor problem requiring service, E2 indicates overheating (check ventilation), and E3 means the lid isn’t properly sealed. If you see flashing lights without error codes, your cooker is actively heating—normal operation. Keep the display clean and dry for optimal visibility during cooking.
Program Selection for Different Rice Types
White Rice Setting for Fluffy Results
Select the white rice program for standard long-grain varieties like jasmine or basmati. This 35-45 minute cycle includes automatic soaking, cooking, and steaming phases for optimal texture. For best results, avoid opening the lid during cooking—steam loss affects results. When the cycle completes, let rice rest for 10 minutes before fluffing with the included paddle. This program automatically switches to keep-warm mode for up to 12 hours, though quality peaks within the first 2-4 hours.
Brown Rice Program for Nutty Whole Grains
Choose the brown rice setting specifically calibrated for whole grain varieties. This 50-60 minute program incorporates extended soaking and lower initial heat to properly break down tough bran layers. Unlike white rice, brown rice benefits from the full cooking cycle without interruption. When complete, let it rest 15 minutes before fluffing—this extra time allows residual steam to finish cooking the grains. The result is tender, nutty brown rice without the chewy texture common in improperly cooked whole grains.
Quick Rice for Time-Crunched Situations
When dinner can’t wait, select the Quick Rice program for 20-25 minute cooking. This higher-heat cycle produces slightly firmer grains but delivers significant time savings. While not quite as fluffy as the standard program, it’s perfect for weeknight meals when timing is critical. Expect a 10% texture difference compared to regular cooking—ideal for dishes where rice texture matters less, like burrito bowls or casseroles. Always use this setting with freshly rinsed rice for best results.
Steam Function for Healthy Side Dishes
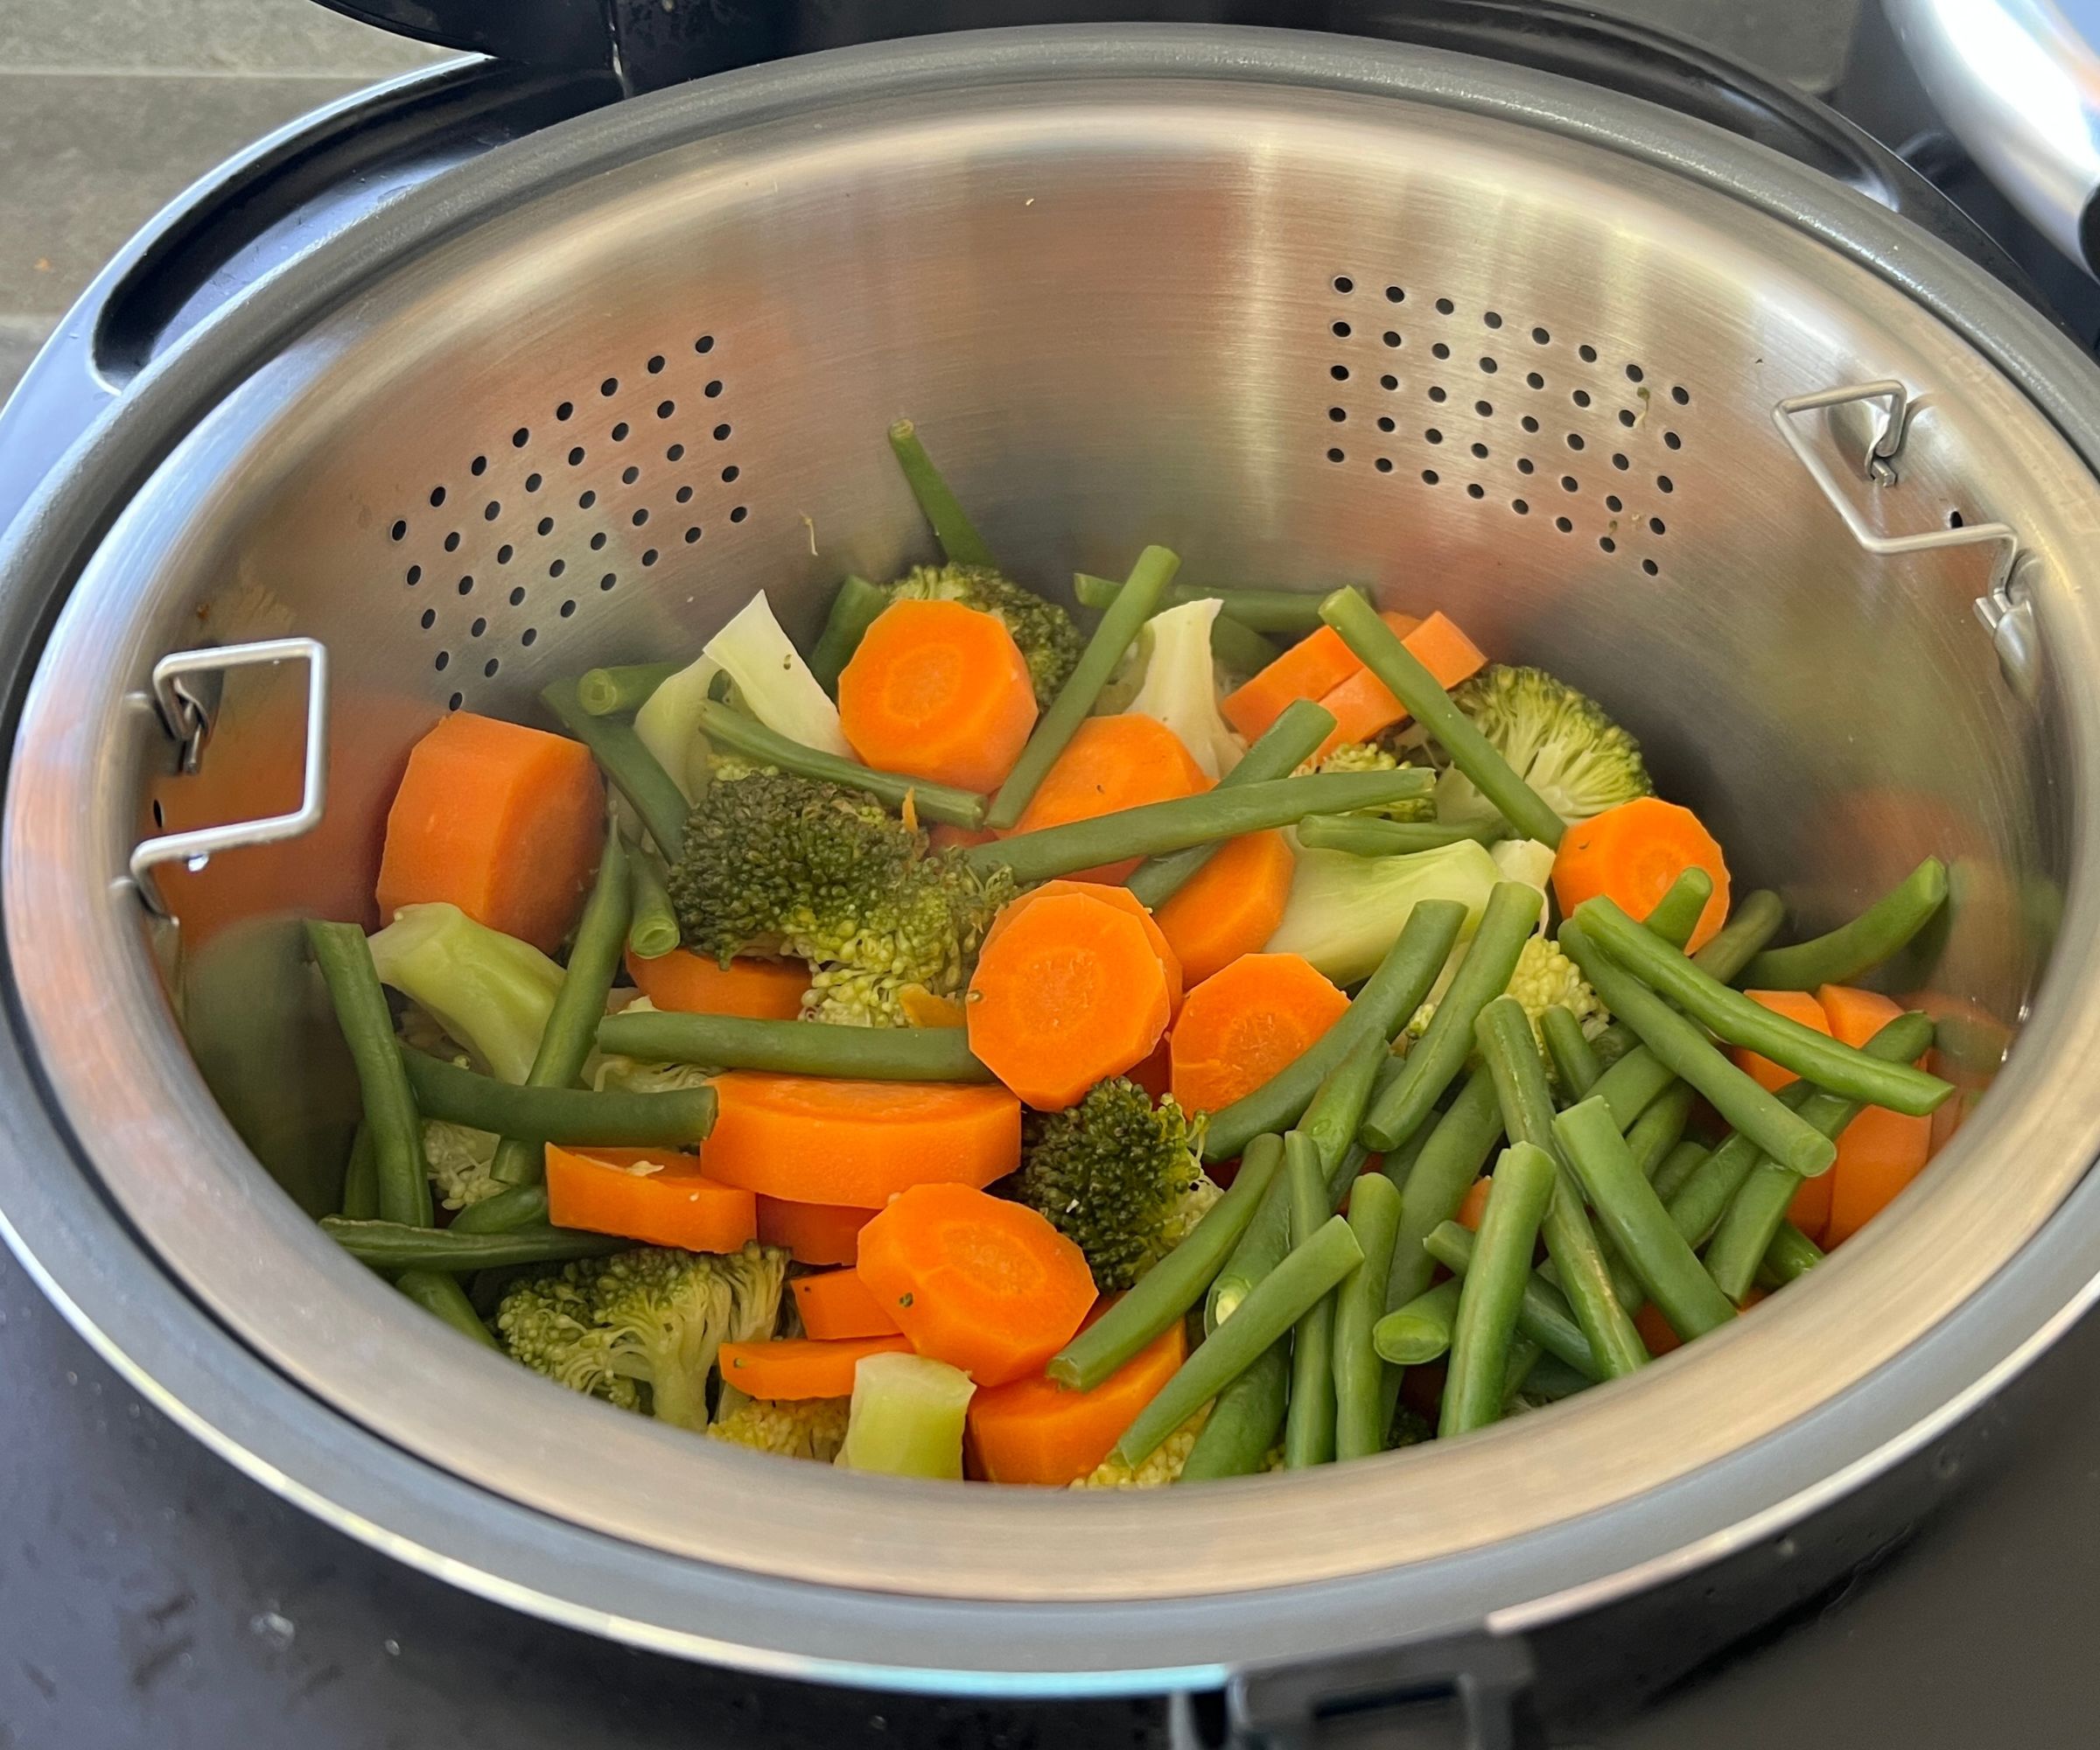
Set Up Perfect Vegetable Steaming
Transform your Cosori into a steamer by adding 1 cup water to the inner pot and placing the steam tray above the water line. Arrange vegetables like broccoli, carrots, or asparagus in a single layer—overcrowding prevents even cooking. For delicate proteins like fish or dumplings, place them in the center of the tray. Set the steam function for 8 minutes for crisp-tender vegetables or 20 minutes for thicker proteins. Always check food with a fork before serving to ensure proper doneness.
Enhance Flavors During Steaming
Boost steamed foods by adding aromatics to the water reservoir. Toss in garlic cloves, ginger slices, or lemon wedges to infuse subtle flavors into your vegetables. For Asian-inspired dishes, replace water with diluted coconut milk or light chicken broth—the steam carries these flavors directly into your food. Add herbs like dill or thyme directly to the steam tray with vegetables for extra flavor dimension. Remember to reduce cooking time by 2-3 minutes when using flavorful liquids, as they often cook food faster.
Keep-Warm and Delay Timer Mastery
Maximize Keep-Warm Function Quality
After cooking completes, your Cosori automatically maintains rice at 140-150°F for food safety. While rice stays safe for 12 hours, texture quality peaks within 2-4 hours. For best results, fluff rice with the paddle after 30 minutes of warming to release excess moisture and prevent compacting. If keeping rice warm longer than 2 hours, remove the steam vent cap to reduce condensation buildup. Never add salt or seasonings during extended keep-warm periods, as they continue to absorb and intensify over time.
Program Delay Timer for Meal Planning
Use the delay timer to have rice ready exactly when needed—perfect for busy mornings or after-work dinners. Set up ingredients in the morning, select your program, then program the delay timer up to 24 hours ahead. Avoid using this feature with perishable add-ins like fresh vegetables or broth, which may spoil during the wait. When using the delay function, reduce water by 1-2 tablespoons to account for extended soaking time. Always verify the display shows your desired ready time before leaving the kitchen.
Cleaning and Maintenance Protocol
Daily Cleaning for Longevity
Always unplug your Cosori and let it cool completely before cleaning. Remove the inner pot and wash with mild detergent—avoid metal scrubbers that damage the non-stick coating. Rinse the steam vent cap under running water to remove starch buildup. Wipe the exterior and control panel with a damp cloth, then dry thoroughly. Never immerse the main unit in water or run it through the dishwasher. For stubborn stains inside the pot, use a baking soda paste rather than abrasive cleaners.
Monthly Deep Cleaning Routine
Mineral deposits from water affect heating efficiency over time. Once monthly, run a cleaning cycle with equal parts white vinegar and water. Fill the pot to the 4-cup line, run a complete white rice cycle, then discard the solution. Wipe the heating plate with a damp cloth—never use abrasives that scratch the surface. Check the steam vent for clogs regularly by holding it up to light; clear blockages with a toothpick if needed. This simple maintenance extends your cooker’s lifespan significantly.
Troubleshooting Common Cooking Issues
Fix Texture Problems Immediately
Rice too wet? Reduce water by 2 tablespoons next time. Undercooked grains? Add 2-3 tablespoons water, close the lid, and restart cooking—it’ll finish in 5-10 minutes. Burnt bottom indicates either insufficient water or a dirty heating plate—clean the plate thoroughly and verify your water measurements. If rice consistently overflows, reduce quantity by 1/4 cup and clean the steam vent cap. For uneven cooking, ensure the inner pot sits flat on the heating plate without wobbling.
Decode and Resolve Error Codes
“E1” signals a temperature sensor problem requiring customer service—don’t attempt DIY repairs. “E2” indicates overheating; ensure 4 inches of clearance around the unit and check for dust buildup on vents. “E3” means the lid isn’t properly sealed—reposition until you hear a firm click. If error codes persist after basic troubleshooting, unplug the unit for 15 minutes before restarting. Never ignore repeated error messages, as they often indicate developing mechanical issues that worsen over time.
One-Pot Meal Creation Techniques

Build Flavorful Layered Dishes
Transform your Cosori into a complete meal station by layering ingredients. Place seasoned rice on the bottom, add water per normal ratios, then layer vegetables and thin protein slices on top. Add seasonings directly to the water—try taco seasoning for Mexican rice bowls or curry powder for Indian-inspired dishes. Use the steam function for the final 10 minutes to cook delicate additions perfectly. Always place heartier ingredients at the bottom where heat is most intense.
Cook Alternative Grains Successfully
Quinoa cooks beautifully using the white rice setting with a 1:1.5 grain-to-water ratio. Rinse 1 cup quinoa thoroughly to remove bitter saponins, add 1.5 cups water, and cook as normal. Let rest 5 minutes after cooking, then fluff with a fork. This same ratio works for farro or barley—just use the brown rice program for these heartier grains. For risotto-style dishes, use the porridge setting with arborio rice and broth instead of water, stirring once halfway through cooking. Experiment with different grains to discover your favorites.

