
Your Vitamix blender powers through frozen fruits, nuts, and tough vegetables with ease—but without proper cleaning, that high-performance machine quickly becomes a breeding ground for stubborn stains and lingering odors. Many owners mistakenly believe their Vitamix is too complex to clean properly, leading to neglected containers with cloudy film and permanent-looking stains. The reality? Cleaning your Vitamix takes less than five minutes when you know the exact techniques Vitamix’s culinary experts use.
This definitive guide reveals the precise methods to make your Vitamix sparkle like new, whether you’re dealing with daily residue or years of mineral buildup. You’ll discover why two drops of soap outperforms a full squirt, how vinegar transforms cloudy containers overnight, and the clever trick that cleans while you cook. Let’s restore your blender to its original gleaming condition with techniques that actually work.
Daily Cleaning Method That Prevents 90% of Problems
Cleaning your Vitamix immediately after use is the single most effective habit for maintaining peak performance. Food residues like nut butters and fruit fibers harden rapidly, turning simple maintenance into a scrubbing nightmare. Vitamix’s Senior Manager of Culinary Education, Adam Wilson, confirms warm water works best for daily cleaning because it effectively removes residue without risking damage to seals or components.
Warm Water Rinse Protocol
Start by removing the lid and rinsing the container under warm running water immediately after emptying your blend. This initial rinse eliminates 80% of food particles before they have time to dry and adhere to the container walls. Don’t use hot water—it creates steam pressure risks and can warp older components. Warm tap water provides the perfect temperature balance for safe, effective cleaning.
One-Drop Soap Cleaning Cycle
Fill your rinsed container halfway with fresh warm water. Now the critical step: add exactly one to two drops of dish soap—no more. Vitamix’s powerful vortex creates massive suds from minimal soap, and over-soaping leads to endless rinsing sessions and potential overflow during cleaning cycles.
Secure the lid firmly and activate your machine. Models with a dedicated cleaning setting should use that feature. For older models without this function, begin on low speed and gradually increase to high. Process for 30 seconds or until thick suds fill the container, ensuring the cyclonic action reaches every surface including the blade assembly’s underside.
Rinse thoroughly with warm water until all soap residue disappears. Invert the container on a drying rack positioned over a kitchen towel—this setup maximizes airflow for complete drying and prevents moisture-related odors that develop in trapped water.
Deep Cleaning Solutions for Cloudy Containers
Overnight Vinegar Soak for Mineral Deposits
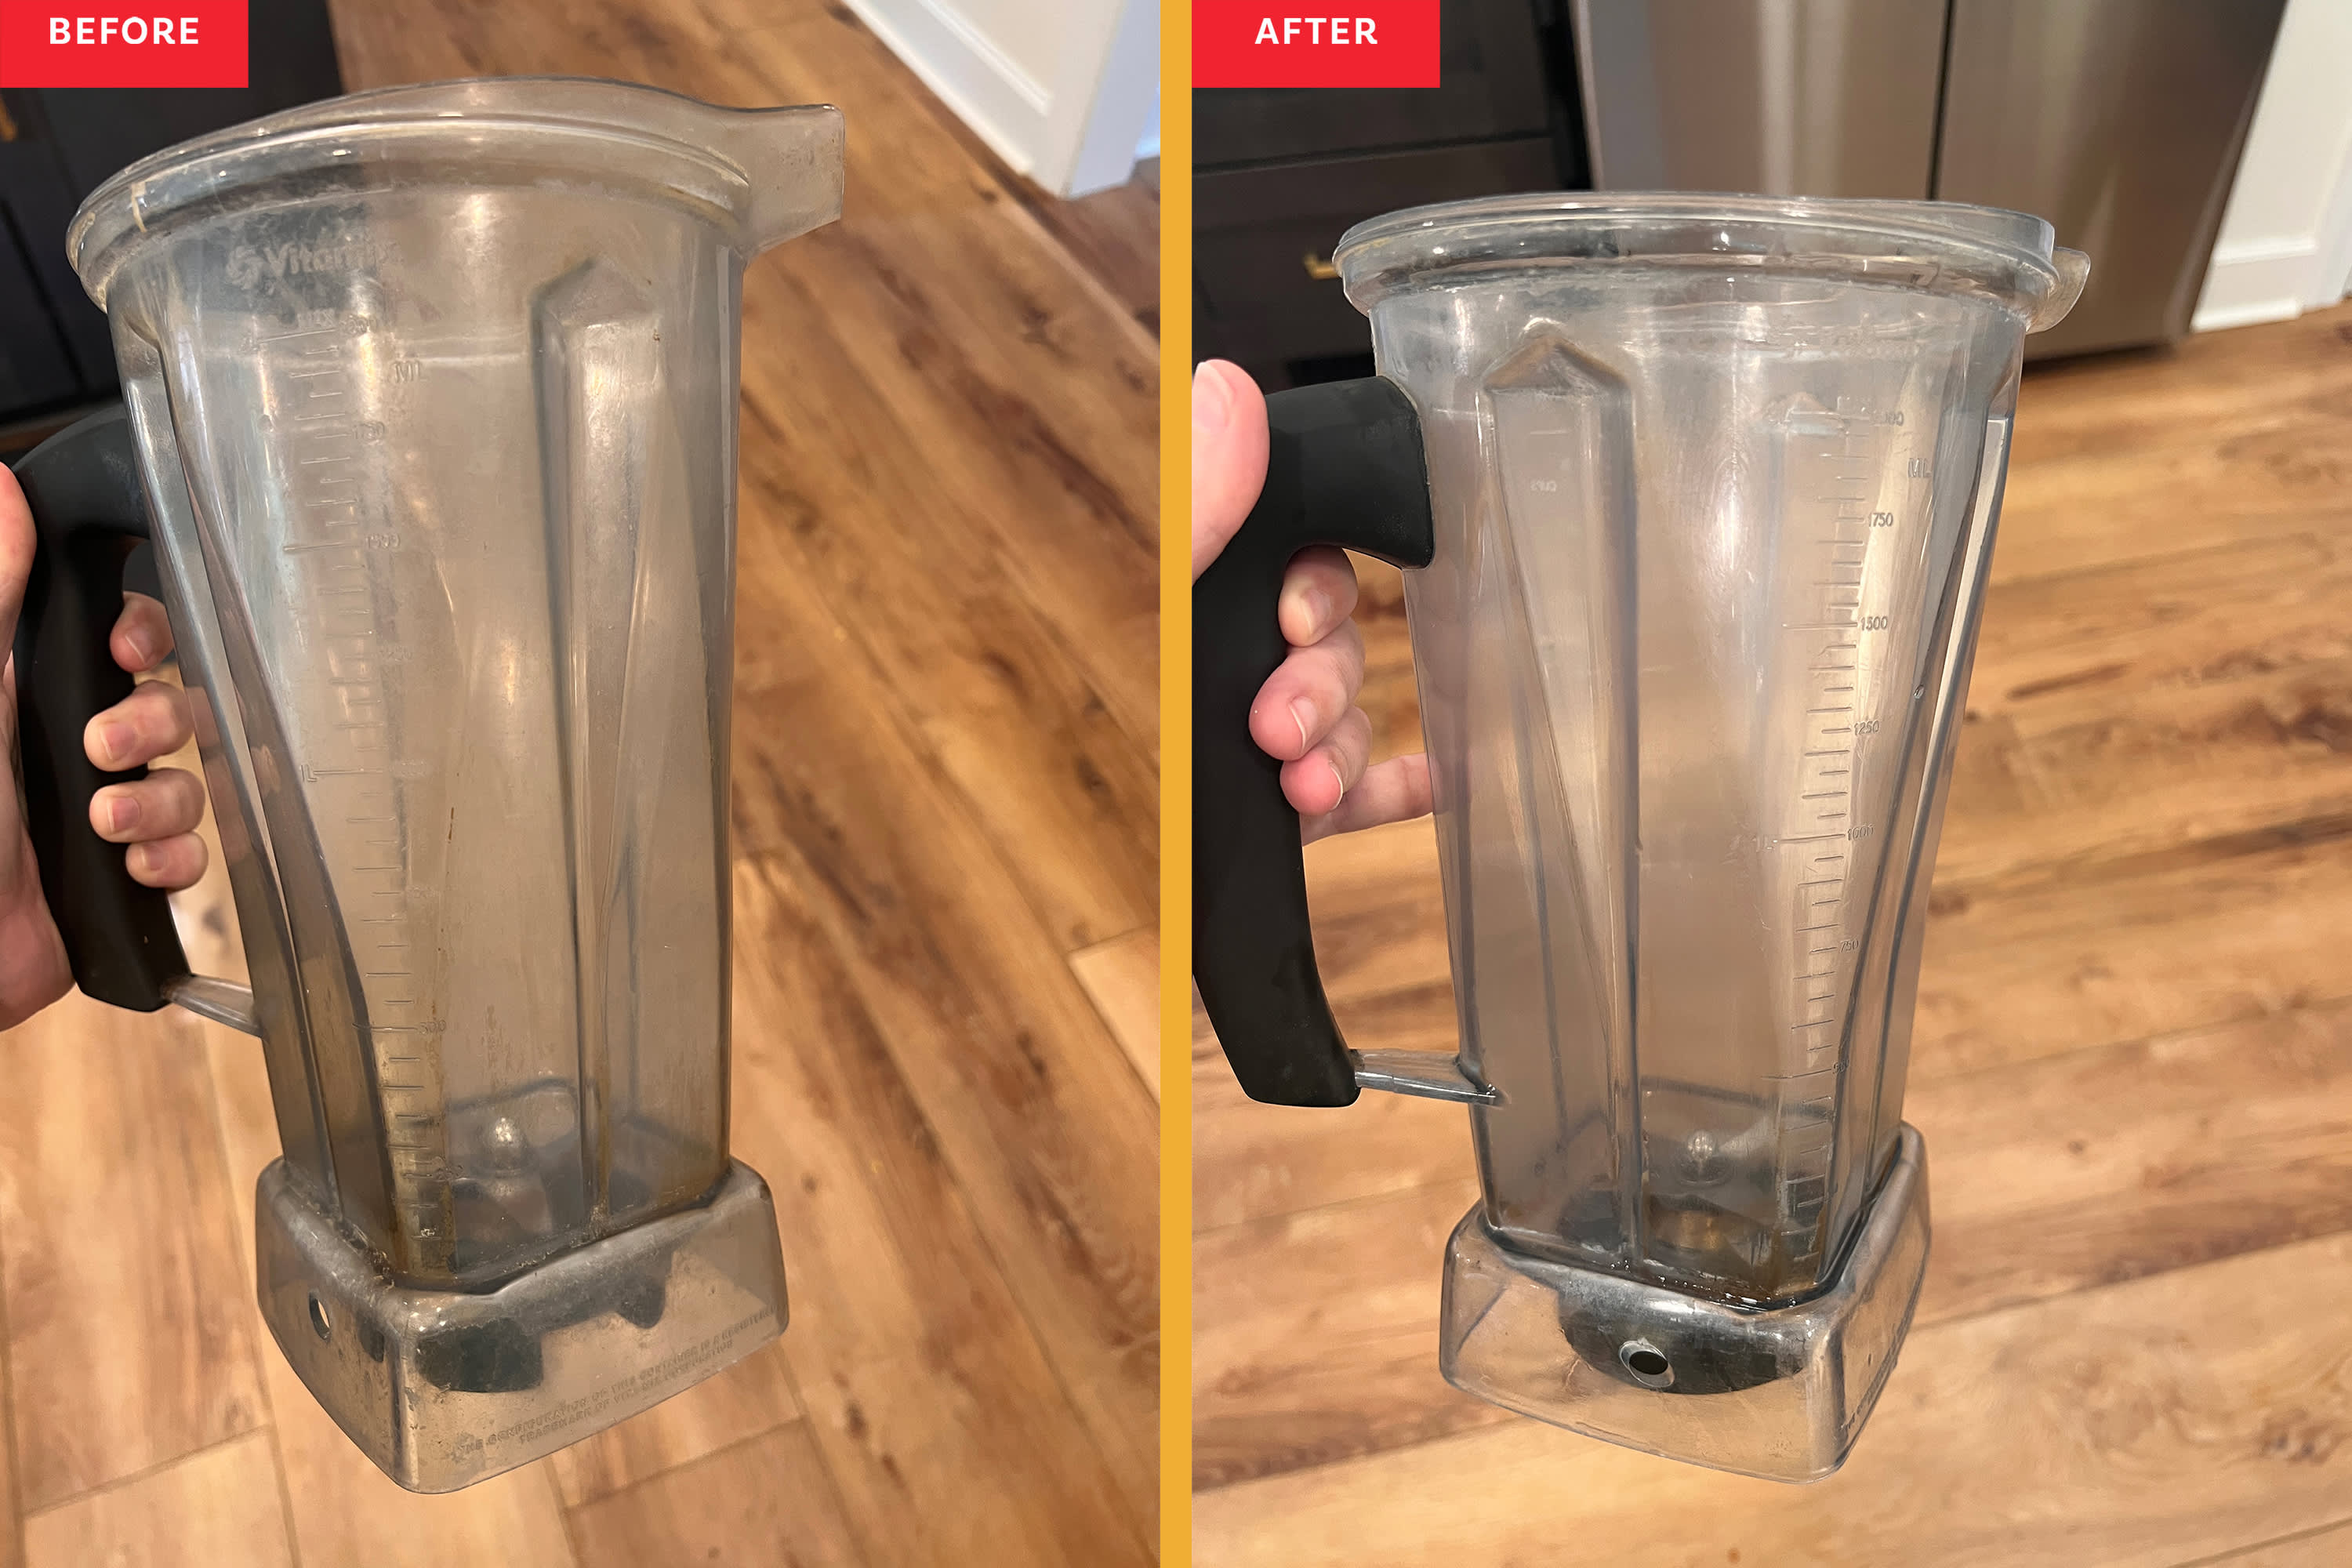
That frustrating cloudy film coating your container walls isn’t damage—it’s harmless mineral deposits from water and food that naturally accumulate over time. Vitamix confirms this buildup is completely normal yet easily reversible with the right approach.
Prepare the solution:
– Fill container halfway with warm water
– Add 1 cup distilled white vinegar
– Blend for 5 seconds to distribute evenly
– Let soak 4-6 hours or overnight
For severe buildup concentrated near the top rim, fill the container completely with vinegar solution to ensure complete coverage. The extended contact time dissolves mineral deposits effectively without damaging the container. Rinse thoroughly and complete a standard cleaning cycle to eliminate any residual vinegar scent.
Baking Soda Paste for Stubborn Residue
When vinegar soaking falls short, baking soda provides gentle abrasion that lifts residue without scratching. Vitamix’s culinary team recommends this method for persistent protein-based residues that resist standard cleaning.
Create effective cleaning paste:
– Mix 1-2 tablespoons baking soda with minimal water
– Use soft-bristled toothbrush to apply paste
– Scrub all interior surfaces, avoiding direct contact with blade edges
– Reapply paste to problem areas as needed
– Rinse completely, then run standard cleaning cycle
The mild alkaline action breaks down stubborn residues while the gentle abrasion lifts mineral deposits. For heavily filmed containers, you may need 2-3 treatments for complete restoration.
Stain Removal Techniques for Pigmented Foods

Turmeric and Spice Stain Elimination
Volatile oils from turmeric, curry, cinnamon, and saffron create vivid stains that seem permanent but are actually treatable. Vitamix’s cleaning protocol for these stubborn pigments uses equal parts water and white vinegar in the container.
Fill the stained container with this solution and let it soak for several hours. After soaking, gently scrub with a soft pot scrubber—never use metal scrubbers as they permanently scratch the plastic. Multiple cleaning cycles may be necessary for complete removal, but remember these stains are purely cosmetic and don’t affect performance or safety.
Cloudy Film Removal Strategy
That unsightly film consists of fruit fibers, vegetable particles, and water minerals bonding to the container surface. While harmless, it makes your investment look neglected. The vinegar method described above effectively addresses this issue, though heavily filmed containers may require 2-3 treatments for complete restoration. Patience pays off—rushing with abrasive tools risks permanent damage.
Dishwasher Safety Guidelines You Must Know

Check your model first—while all legacy series and newer Vitamix containers are dishwasher-safe, high heat can damage older components or warp seals. Vitamix recommends hand washing as the safest approach, especially for containers showing any signs of aging.
If using the dishwasher:
– Place container on top rack only
– Remove blade assembly if possible
– Use normal cycle, not sanitize or heavy-duty
– Allow complete cooling before removing
High-temperature cycles compromise the integrity of plastic components over time, potentially leading to cracks and leaks. When in doubt, stick to the warm water and soap method that Vitamix engineers designed specifically for your machine.
Pro Cleaning Hacks From Vitamix Experts
Soup-Making Cleaning Trick
Here’s Vitamix’s best-kept secret: After making nut butter, prepare a soup in the same container. The soup-making process naturally cleans residual oils while infusing your dish with subtle nutty undertones. This works particularly well with creamy tomato or butternut squash soups—the heat and extended blending time dissolve oils completely.
Essential Prevention Strategies
Store containers inverted on drying racks to ensure complete drainage. Any remaining moisture creates mineral spots and potential odor issues. Towel-dry the interior after washing to minimize mineral deposit formation—this simple step significantly reduces vinegar soak frequency.
Avoid the stacking trap—never nest Vitamix containers inside each other. Trapped moisture creates the perfect environment for mold and mineral buildup that requires intensive cleaning later.
Common Cleaning Mistakes That Damage Your Vitamix
Using boiling water damages seals and creates dangerous steam pressure. Stick to warm tap water instead—it’s what Vitamix’s engineering team specifies for safe cleaning.
Excessive soap creates overflowing suds that require endless rinsing. Two drops maximum is all you need—the powerful vortex creates massive suds from minimal soap.
Letting residue dry transforms simple cleaning into major restoration projects. Clean within 30 minutes of use whenever possible—this single habit prevents 90% of cleaning challenges.
Ignoring the lid—clean the lid thoroughly after each use. Trapped residue here creates odors that transfer to fresh blends and often gets overlooked during standard cleaning.
Quick Reference Cleaning Guide
For daily cleaning: Warm water + 2 drops soap + 30-second blend cycle
For cloudy film: Vinegar soak overnight, then standard cleaning
For stubborn stains: Baking soda paste + gentle scrubbing
For immediate cleaning: Never let residue dry in the container
Your Vitamix represents a significant investment in kitchen efficiency. With these precise cleaning techniques, you’ll maintain peak performance while extending your blender’s lifespan by years. The key is consistency—clean immediately after each use, use the right amount of soap, and deep clean quarterly. When you follow Vitamix’s own recommended protocols, every blend starts fresh, clean, and odor-free. Your future self will thank you when your five-year-old Vitamix performs like it just came out of the box.

