
Your Ninja air fryer works overtime creating crispy fries and golden chicken, but that amazing performance depends on one crucial habit—proper cleaning. Neglect those food particles and grease buildup, and you’ll soon battle smoke, off-flavors, and even permanent damage to your favorite kitchen companion. Knowing exactly how to clean Ninja air fryer properly transforms maintenance from a dreaded chore into a quick routine that preserves performance.
This comprehensive guide delivers precise techniques for maintaining every component, tackling stubborn residue, and preventing future buildup. You’ll discover time-tested methods that keep your air fryer delivering restaurant-quality results for years to come—without damaging those delicate non-stick surfaces.
Essential Safety Steps Before Cleaning Your Ninja Air Fryer
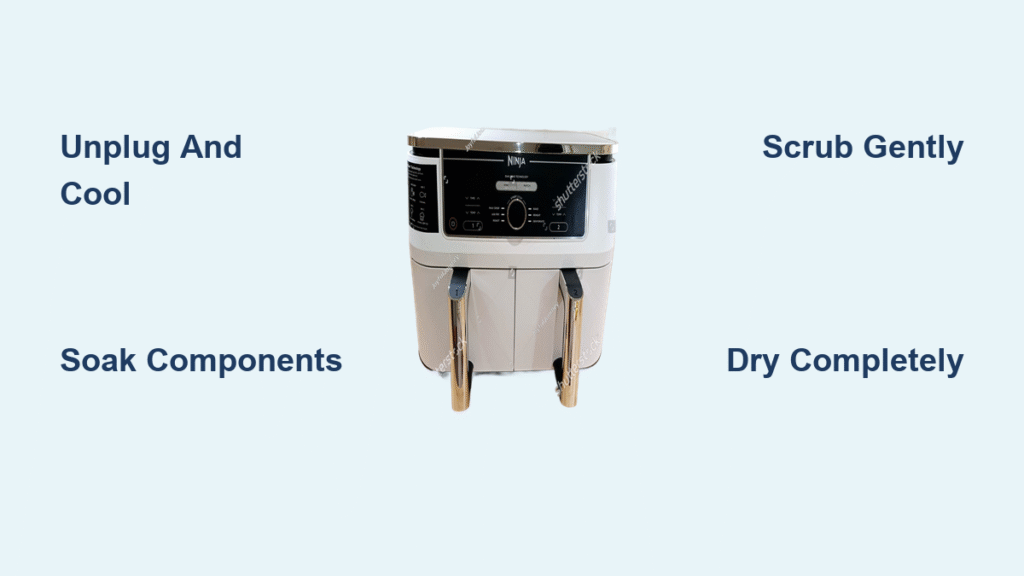
Skipping safety protocols while trying to clean Ninja air fryer creates unnecessary risks and potential appliance damage. Always unplug your unit and allow it to cool for 15-30 minutes after cooking—this single step prevents burns and protects internal components from thermal shock. Never attempt cleaning while the unit feels warm to the touch or remains plugged in, as moisture near electrical components creates serious hazards.
Work on a stable, heat-resistant surface with adequate lighting to identify all areas needing attention. Keep water away from control panels and electrical connections, and gather all cleaning tools before starting to avoid rushing through critical safety steps. This preparation ensures you can focus on thorough cleaning without compromising safety.
Quick Safety Checklist for Cleaning
- Unplug and cool completely (15-30 minutes minimum)
- Work on stable, heat-resistant surface away from water sources
- Keep electrical components dry at all times
- Use appropriate lighting to spot hidden food particles
Daily Quick Clean Routine After Every Use
Remove components immediately after cooling to prevent food from baking onto surfaces. Press the release button to separate the basket from the crisper plate—handle both carefully to protect the non-stick coating that makes cooking effortless. This simple step prevents minor messes from becoming major cleaning challenges later.
4-Step Daily Cleaning Process
-
Empty debris using silicone or wooden utensils—metal tools scratch surfaces permanently and void warranties. Gently scrape out crumbs and food particles before they harden.
-
Rinse under warm water with mild dish soap and soft sponge. Focus on corners where oil and crumbs accumulate most. Avoid abrasive scrubbers that damage non-stick surfaces.
-
Wipe interior cavity with a damp cloth while components soak. Pay special attention to the bottom where grease collects and around the heating element housing.
-
Air dry completely on dish rack before reassembly. Moisture trapped in components creates steam during next use, affecting cooking performance and potentially damaging electrical parts.
Pro tip: Clean while components are slightly warm (not hot) for easier debris removal, but always ensure the main unit is completely cool before handling.
Deep Clean Ninja Air Fryer Components Weekly

Basket and Crisper Plate Deep Clean
Soak for 10-15 minutes in hot, soapy water with 1 tablespoon baking soda for stubborn residue. This soaking period loosens baked-on particles without aggressive scrubbing that damages non-stick surfaces. For extremely stuck-on food, extend soaking time up to 30 minutes.
Scrub gently using soft-bristled brushes for textured areas. Pay special attention to the mesh bottom—this area traps the most food particles and affects air circulation. Clean crisper plate ridges thoroughly, as carbonized residue here creates smoke during future cooking. Rinse multiple times to remove all soap residue that could affect food taste.
Interior Cavity Cleaning
Access heating element by removing all components first. Use a damp cloth with mild soap to wipe interior walls, bottom surfaces, and around the heating element housing. Never apply pressure to the heating element—gentle wiping removes buildup without damage. For stubborn spots, create a baking soda paste (3 tablespoons baking soda with 1 tablespoon water) and let sit 15 minutes before wiping.
Critical drying step: Ensure heating element housing and all interior surfaces are completely dry before reassembly. Residual moisture creates steam that affects cooking performance and can damage electrical components over time.
Remove Stubborn Residue From Your Ninja Air Fryer
Baked-On Food Solutions
Steam-cleaning method works wonders for stubborn residue. Add 1 cup water and 1 tablespoon vinegar to the basket, then run at 350°F for 5 minutes. The steam loosens particles without harsh scrubbing—let cool completely before wiping clean. This technique safely removes carbonized buildup that resists manual cleaning.
Baking soda paste handles the toughest spots. Mix 3 tablespoons baking soda with 1 tablespoon water, apply to stubborn stains, and let sit 15-20 minutes. This natural abrasive breaks down residue without damaging non-stick coatings. For extreme cases, repeat the process before resorting to commercial cleaners.
Grease Buildup Elimination
Hot water plus degreasing soap dissolves accumulated oils effectively. Use dish soaps like Dawn specifically designed to cut through grease. For extreme buildup, commercial degreasers labeled safe for kitchen appliances work well—always rinse thoroughly to prevent taste transfer in future cooking sessions.
Natural Cleaning Solutions That Work for Ninja Air Fryers
Lemon Power Clean
Cut a lemon in half and rub directly on stubborn spots. The natural acids break down grease while leaving a fresh scent. Follow with warm water rinse for chemical-free cleaning that’s safe for food-contact surfaces. This method works particularly well for deodorizing after cooking fish or strong-smelling foods.
Vinegar Deodorizing
Mix equal parts white vinegar and warm water for grease-cutting and deodorizing action. This solution eliminates lingering food odors while sanitizing surfaces. Rinse thoroughly to prevent vinegar taste in future cooking—especially important before preparing sweet items.
Warning: Natural solutions work best for regular maintenance. Extreme buildup may require commercial cleaners designed for kitchen appliances, but always verify they’re safe for non-stick surfaces.
Heating Element Deep Clean Monthly
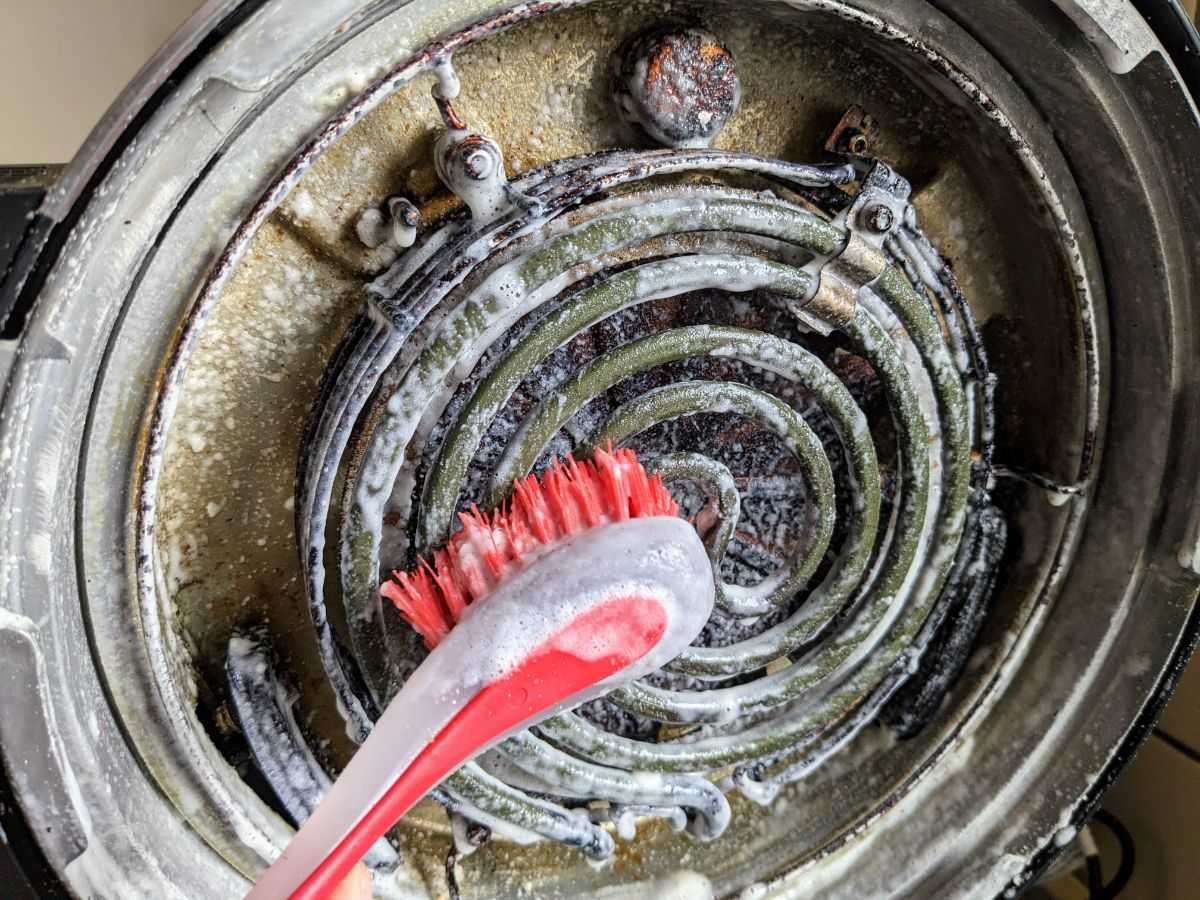
Access carefully by turning the unit upside down. Use a flashlight to inspect for visible buildup on the heating element—this monthly check prevents smoking and maintains even cooking temperatures. Never immerse the heating element in water or use excessive moisture during cleaning.
Clean without water using only soft brushes or slightly damp cloths. Never pour water directly on the heating element, as this creates electrical hazards. For stubborn residue, use a dry brush first, then a barely damp cloth if needed—always ensuring the element is completely dry before next use.
Prevent Future Buildup in Your Ninja Air Fryer
Use parchment paper or silicone mats for messy foods like wings or glazed items. These protective barriers catch drips while maintaining air circulation—just ensure they don’t block air flow around food. This simple step reduces cleaning time by 75% for particularly greasy or saucy dishes.
Clean spills immediately when they occur. Fresh residue wipes away easily, while baked-on messes require intensive cleaning later. This habit saves hours of scrubbing over time and maintains optimal performance for every cooking session.
Smart Storage Tips
- Store completely dry to prevent mold and mildew
- Keep basket slightly open for air circulation
- Cover with breathable cloth in dusty environments
- Position away from steam sources like dishwashers
Troubleshooting Common Ninja Air Fryer Cleaning Problems

When Food Won’t Release
Soak longer—increase soaking time to 30 minutes for extremely stubborn residue. Add more baking soda to the soaking water, or use the steam-cleaning method twice for tough cases. For persistent spots, apply baking soda paste and let sit overnight before gentle scrubbing.
Lingering Odors Solution
Deodorize naturally by running empty at 400°F for 10 minutes to burn off residue. Place lemon slices in the basket and run at 250°F for 5 minutes for fresh scent. Persistent odors may require activated charcoal overnight in the closed basket—place in a small bowl to avoid direct contact with surfaces.
Non-Stick Coating Issues
Stop immediately if coating appears damaged or peeling. Discontinue use and contact Ninja customer service—cleaning damaged coatings creates health risks and voids warranties. Never use metal utensils or abrasive cleaners that accelerate coating deterioration.
Complete Monthly Maintenance Checklist
Disassemble thoroughly checking all connections, gaskets, and seals for wear. Clean every crevice using cotton swabs for tight spaces. Inspect rubber feet and base for damage that affects stability during operation.
Document issues like unusual wear patterns or component damage. This monthly inspection catches problems early, maintaining warranty coverage and preventing cooking failures. Pay special attention to drainage holes that can become clogged with food particles over time.
Extend Your Ninja Air Fryer Lifespan Through Proper Cleaning
Consistent cleaning habits determine whether your air fryer lasts 2 years or 10. Daily quick cleans prevent major buildup, while monthly deep cleaning maintains peak performance. The 15 minutes you invest weekly saves hours of intensive scrubbing later and ensures every meal tastes exactly as intended.
Remember: Clean components completely cool, never use metal utensils, and always dry thoroughly before storage. These simple practices keep your Ninja air fryer delivering crispy, delicious results meal after meal, year after year. Proper maintenance transforms your appliance from a short-term kitchen novelty into a lifelong cooking companion that consistently performs like new.

